|
10 Gallon Brew System
5 Gallon All-Grain
Brewing
Beer
Log
Brewing Tips & FAQ
Brewzilla System &
Mods
Build a Keg Washer
Concentrated Brewing
Exhaust Fan/Vent
Hood
Extract w/ Grains Brewing
Fermentation Fridge/Freezer
Fermzilla Conical
Hard Cider
Recipe
Hard Seltzer
(MikeClaw)
Monster Mill
Parti-Gyle Brewing
Saving
& Reusing Yeast
Sour & Funky Beers
Wine & Mead
Chest Freezer Kegerator
Fridge Kegerator
Sanyo Kegerator
Custom Tap
Handles
Keezer Compressor
Fix
Quick & Easy Drip Tray
Bread & Sourdough
Fermented Food
Gun Pictures
Hunting
Smoking Meat
|
|
Welcome to MikeBeer! |
|
UPDATE - Website Shutting Down 8/4/2024
It's been a great run, but I just don't find I'm updating this site
as often as I used to, and the cost of hosting isn't worth the money
at this point. I'm glad this site has been so helpful to so
many brewers over the years, especially the Chest Freezer Kegerator
page. I've received a ton of feedback on that site and others.
Happy brewing all! Cheers!
|
|
|
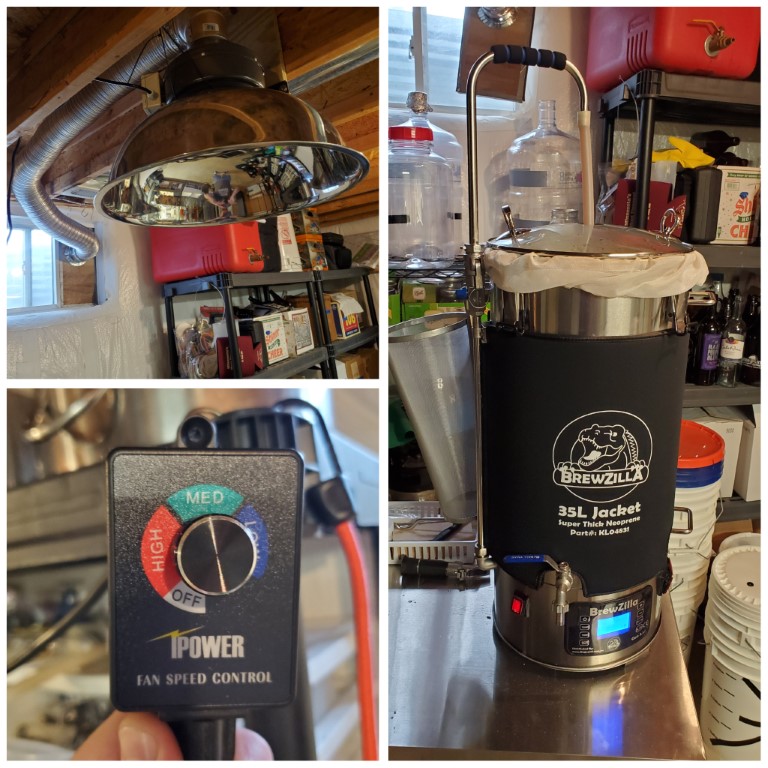
I've always liked the idea of brewing inside, but I've never
wanted to really dedicate a room or large space to a brew
stand. With more and more portable electric brew
systems coming out each year, and with winter fast
approaching, I decided it was time to try one out. I
settled on the Brewzilla (formerly the RoboBrew) 35L 110v
system. I got everything I needed for around $450,
which is a pretty good deal considering what's included.
Along with the new brew system, I decided to install a vent
in the basement so I could brew down there year round if I
wanted to. This system doesn't put off a ton of
moisture, but if I decide to use this in the middle of
summer, I didn't want all that extra humidity floating
around the house. Check out more detailed info on both
projects using the links below: |
|
Brewzilla Electric System |
Exhaust Fan/Vent
Hood |
|
|
|
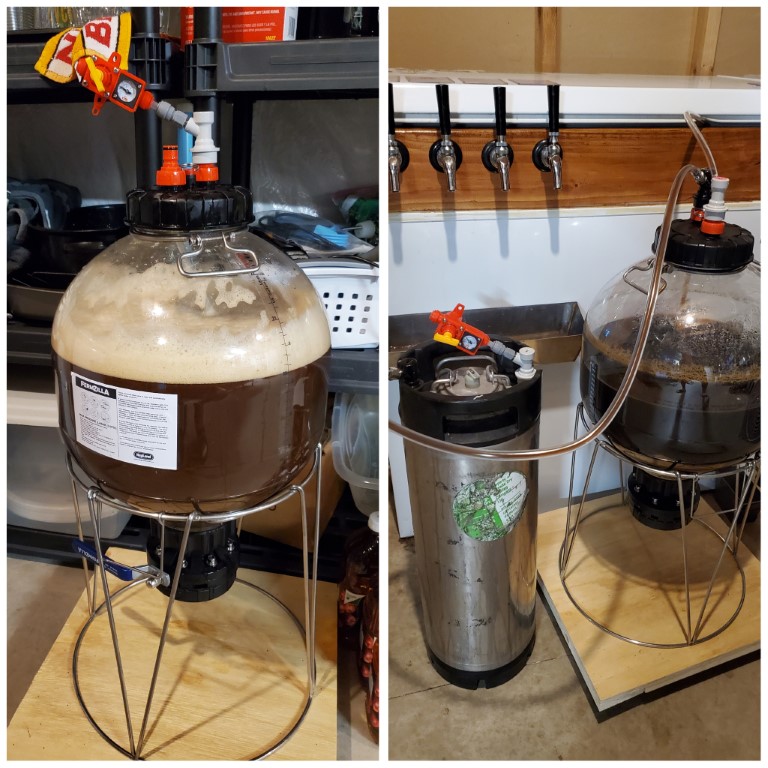
UPDATE 2024: I ended up selling my Fermzilla to
a beer club friend, because I didn't really like the bottom
yeast collection port. I ended up buying an
All-Rounder instead, which is basically the same
fermenter without the yeast collection piece at the bottom.
That has worked well for me for the past year or so at this
point.
I've always liked the idea of a conical fermenter, but the
stainless options available to homebrewers were just too
expensive for me. So when I saw several good reviews
of the Fermzilla Conical fermenter, I decided to give it a
try. I've only put a couple batches through it so far
and haven't had a chance to put them on tap yet, so the jury
is still out on how it performs to reduce esters in lagers &
allow for the addition of hops via a CO2 flushed vessel on
the bottom, but I look forward to testing it out more in the
future.
Fermzilla Conical Fermenter & Stand |
|
|
|
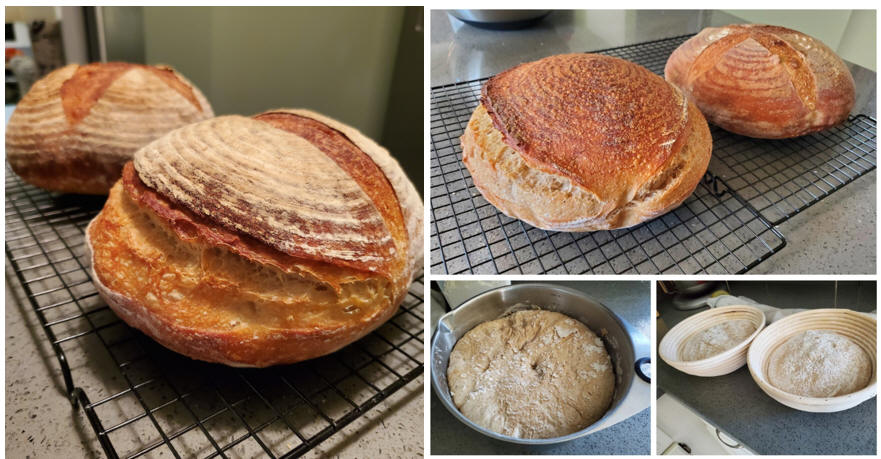
I've been baking bread a off and on for several years, but
during the time of our lord COVID-19, I decided to try out
the sourdough process. After doing some research
online, I realized that sourdough wasn't some mystical &
magic process. It's just a mixture of wild yeast and
lactobacillus that is naturally found in flour. I
decided to purchase an established sourdough starter online
at Breadtopia.com to
act as kind of a control starter. Shortly after I had
that starter built up, I also created my own starter so I
could compare the two later down the line. I decided
to start create a few pages so I can document and share my
sourdough journey and experiments. There is a lot of
info online, so I have included some links to resources and
products in the link below that I have found helpful over
the last several months.
Bread & Sourdough Baking
|
|
Hard Seltzer (AKA MikeClaw) Recipe & Process |
|
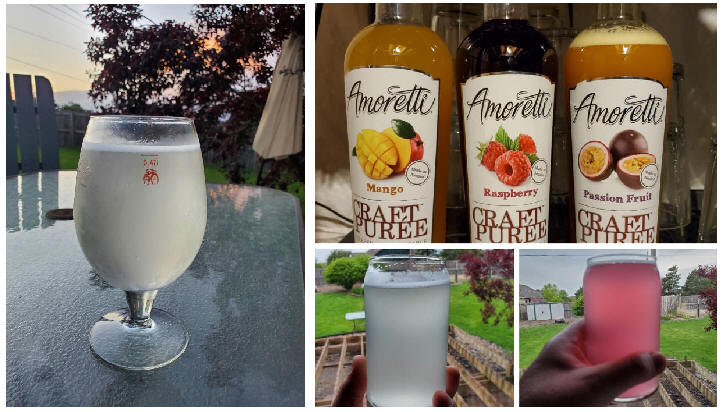
As much as I want to say I can drink super
juicy IPAs & NEIPAs all day long, it's just not true. I used
to have a hard cider or something lighter after a couple
more robust beverages, but lately I've been trying more
brands & flavors of hard seltzer instead. What I
really don't like is the $15 per 12-pack price tag,
considering it's just sugar, yeast, and flavoring.
After doing a little research and trying a few different
batches, I think I have the process down. While my
seltzers may not have a perfectly clean fermentation
profile, I can knock out a 5-gallon batch for less than the
cost of a 12-pack at the store. I'll call that a win!
Check out the link below for more info on my process, along
with a few recipes and ideas for future batches.
MikeClaw - Hard Seltzer Process & Recipes
|
|
Fruit Wine Experiements |
|

With being at home a lot more with COVID-19,
I got a little stir-crazy and started thinking about random
things I could ferment. It started with dandelions
from the yard one day before I mowed. That was an extremely
time-consuming process to pick and then squeeze the
dandelion petals out of the stems. As that batch was
fermenting, I stumbled across an Orange/Citrus wine recipe,
so I figured I'd give that a shot as well. Check out
more info with recipe and brewing process at the link below:
Wine
Experiments
|
|
How to
Build a Keg/Carboy Washer |
|
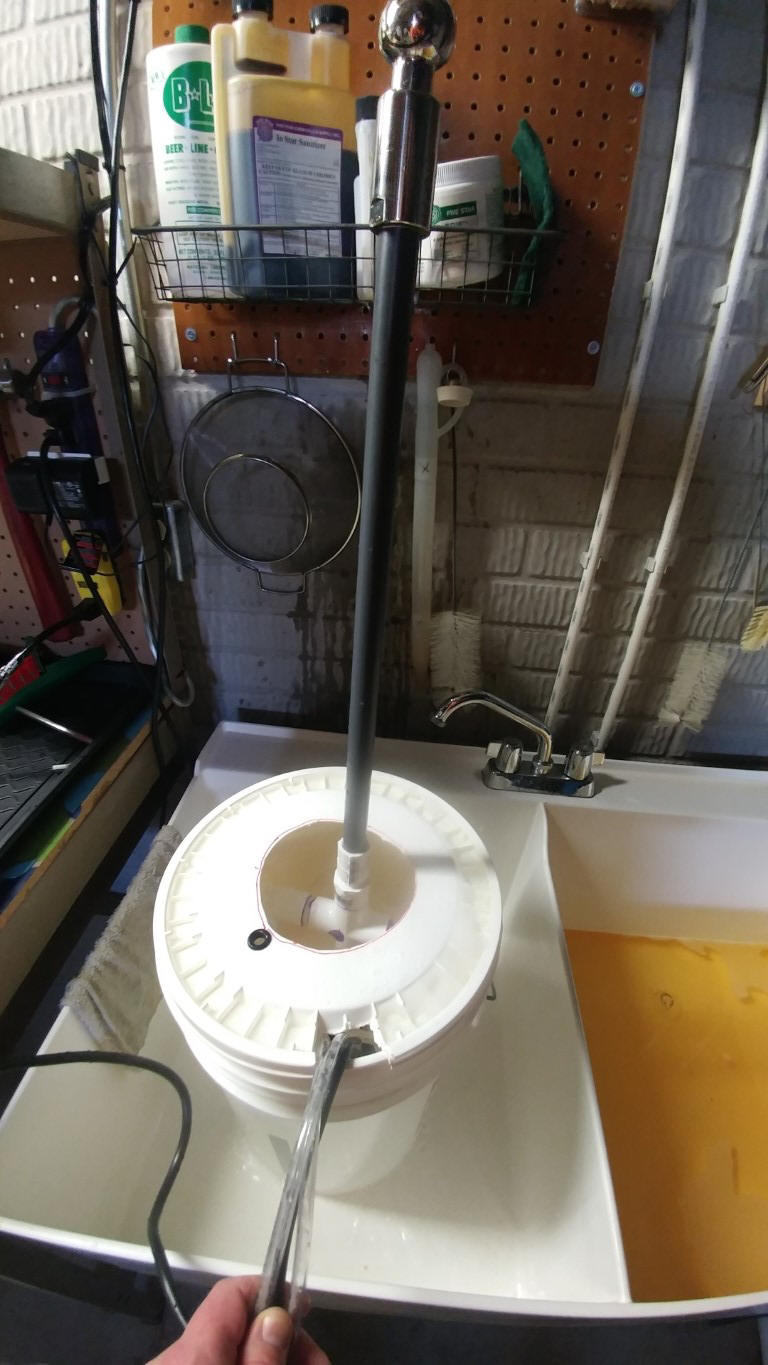
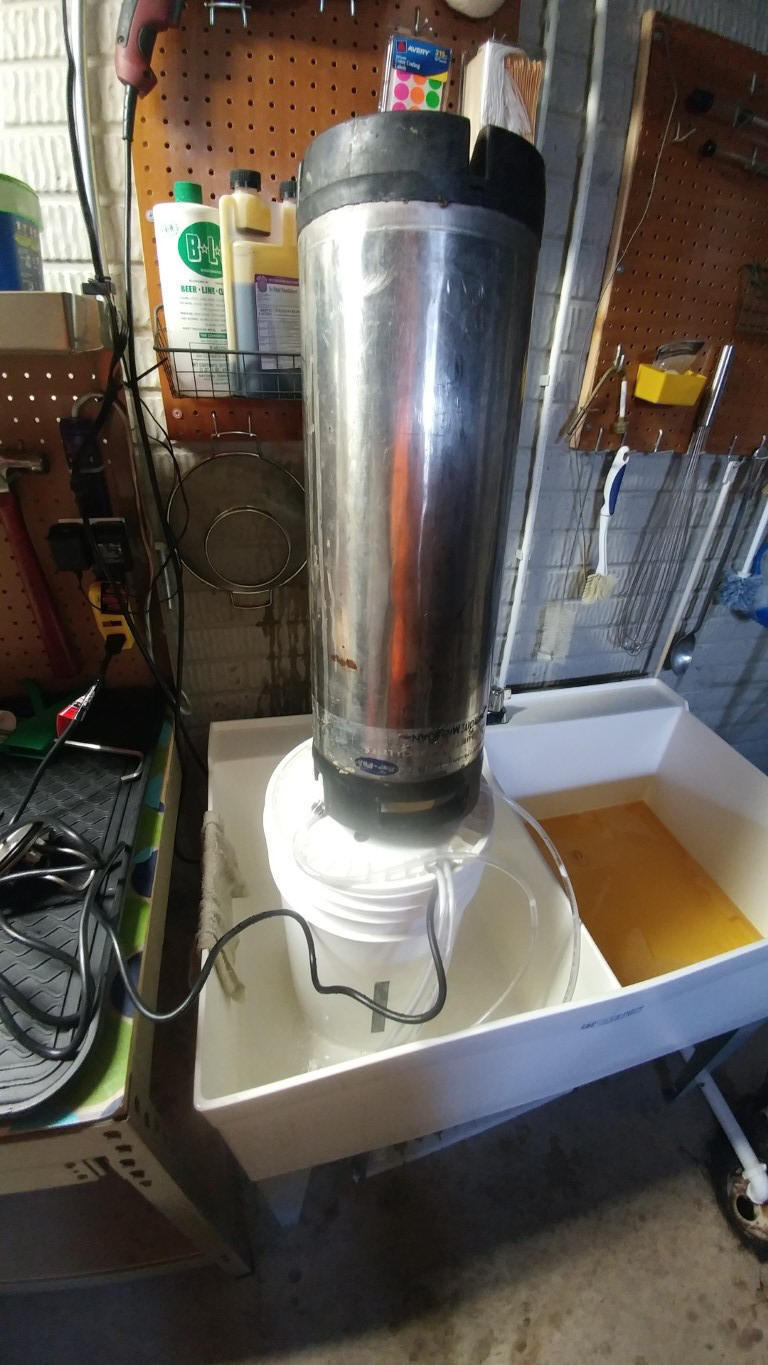
UPDATED 6/10/2020 - I decided to make the top of
my keg washer a little more sturdy so I wouldn't have to
hold it while being cleaned and sanitized. This turned out
to be pretty easy by modifying the base a little bit, adding
a PVC reducer, and a couple pieces of scrap wood on top of
the lid for stability and to provide clearance for the quick
disconnects.
Cleaning kegs has always been a labor-intensive task for me.
Every time I clean I keg, I completely disassemble
everything in order to clean and sanitize all parts (posts,
poppets, dip tubes). After a long day of cleaning 7 or
8 kegs, I decided I was ready for a more automated process.
Looking at commercial (homebrew) keg washers, they just
didn't seem to be built very sturdy or have strong pumps, so
I started looking into building my own. After doing
some research and a few trips to the hardware store, I was
able to build my own more powerful keg washer for around the
same price as the commercial model. Check out the
build process HERE
for more info
and pictures.
|
|
|
|
When I first started brewing, I would write down all my
recipes in spiral notebooks. After starting to develop my
own recipes, and especially after moving to all-grain, I
decided to test out the various brewing software packages. I
really liked the usability of BeerSmith, and I've stuck with
that over the years. It also happens to have a nice HTML
output that looks pretty good on the website. Check out the
Beer Log link below or on the top navigation bar.
Check out my Beer Log HERE.
|
|
|
|
During the
winter or when I'm feeling lazy, I can't/don't want to brew
on my 10-Gallon Brewing System. This got me thinking
of a way that I could produce ten gallons of beer on my
5-gallon system without having to do a double brew day.
This method is really geared towards brewing lower gravity
session-type ales or lagers and has worked out great the
several times I've used it. More info can be found
HERE. |
|
|
|
I received an
email from someone who was building a chest freezer
kegerator (keezer) asking about what I used for a drip tray.
I realized that I hadn't put together any information on
what I came up with for a drip tray without having to drill
into the freezer. Check out the link
HERE or on the
left navigation bar for more info. |
|
|
|
Being an active
member of three different homebrew clubs, I have a chance to
talk with a lot of different brewers at different stages of
their brewing evolution. I really enjoy talking with
the guys that are just getting started, because I feel like
I can save them time and effort by not necessarily doing the
things that were considered necessary several years ago.
I was going to just post the information on the main page
here, but there was a little too much to include, so I
decided to make a separate page
HERE.
I'll try to keep this updated as I hear different questions
and other topics that people seem to ask about frequently. |
|
Contact Information:
MikeYoungHB
at gmail.com
*As an Amazon Associate I earn from qualified purchases*
|
|