|
10 Gallon Brew System
5 Gallon All-Grain
Brewing
Beer
Log
Brewing Tips & FAQ
Brewzilla System &
Mods
Build a Keg Washer
Concentrated Brewing
Exhaust Fan/Vent
Hood
Extract w/ Grains Brewing
Fermentation Fridge/Freezer
Fermzilla Conical
Hard Cider
Recipe
Hard Seltzer
(MikeClaw)
Monster Mill
Parti-Gyle Brewing
Saving
& Reusing Yeast
Sour & Funky Beers
Wine & Mead
Chest Freezer Kegerator
Fridge Kegerator
Sanyo Kegerator
Custom Tap
Handles
Keezer Compressor
Fix
Quick & Easy Drip Tray
Bread & Sourdough
Fermented Food
Gun Pictures
Hunting
Smoking Meat
|
|
Fermented Food |
|
|
|
|
Disclaimer:
Fermenting food at home is considered very safe
and has been done for hundreds of years (if not longer) to
preserve seasonal food for eating throughout the year. I am
not a food scientist, nor do I play one on TV, so before you
jump into fermenting food at home, please do your own
research to make sure you're following safe practices.
I've included a link below to a very thorough site that
describes how to safely ferment food at home if you decide
to start down the fermented food rabbit hole:
https://www.foodsafetynews.com/2014/03/fermenting-veggies-at-home-follow-food-safety-abcs/ |
|
|
|
Compared to my
other fermentation hobbies, fermented food (at least to
start) doesn't require that much equipment besides what I
already had in the house. I'm sure this can grow
depending on the type of food you're fermenting or the
process you're following, but the basic setup is pretty
simple.
Wide-Mouth Mason Jars, Lids & Rings
I would suggest starting with pint or quart mason jars and move up
in size from there as you find recipes you like or if you're
planning on sharing with friends. You can find them on
Amazon, but they will most likely be cheaper at your local
home store.
Fermentation Lids & Weights
I tried some naturally fermented pickles a few years ago,
but the process had me releasing pressure from the jar a
couple times a day under threat of the jar exploding.
Needless to say, I wasn't a fan of that, so I didn't try
another batch until recently. After doing a little more research, I
found a lot of people use special lids that allow CO2 to
escape during active fermentation. I also learned that
you really don't want your vegetables sitting above the
brine, or you risk mold developing and ruining your whole
batch. To remove/reduce this risk, they make glass
fermentation weights that sit on top of your veggies to keep
them safely below the surface of the brine.
Water Filter, Measuring Cup & Thermometer
Most municipal water supplies contains chlorine, which can
inhibit/prevent natural fermentation form occurring. I
use filtered water from my fridge that I heat up to around
90 degrees in the microwave in a pyrex measuring cup so I can dissolve the salt in
the brine, but not be too hot to kill off any naturally
occurring yeast & healthy bacteria. You can play
around with using store-bought spring or distilled water if
you'd like to try some experiments and see what works best
for you.
|
|
|
|
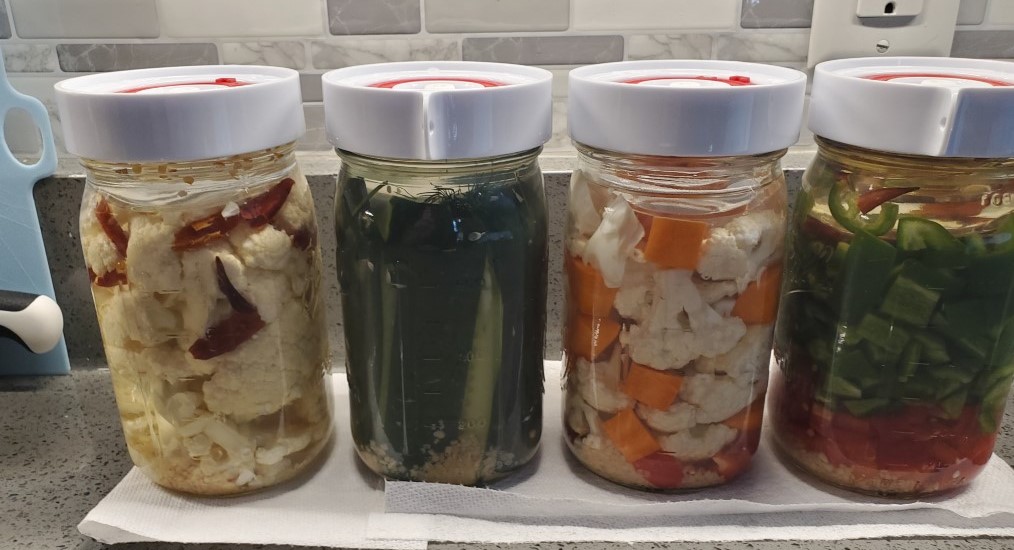
Standard
Natural Fermentation Process You can ferment
just about any vegetable by washing it, cutting it up,
putting it in a clean jar, and adding a simple brine to
cover. A standard brine recipe is 1.25 - 1.5 tsp of
salt per cup of warm filtered water. You want to
make sure that your water doesn't get much above 90 degrees,
as the lactic acid bacteria and healthy yeast may be killed
off if you go warmer than 110 or so. If your water is
a bit too hot, just let it cool at room temp for a bit or
add an ice cube if it's very hot. After you have your
veggies covered in brine, add your fermentation weight and
screw on your fermentation lid. Most recipes suggest
leaving the jar at room temperature for 3-7 days, but you
can test after a few days to see if there is enough acidity
for you. After you reach your desired acidity, add a
standard lid & ring, and put the jar in the fridge.
You may want to leave the lid on a little loose or check the
pressure every few days, as I've found some batches tend to
keep fermenting at the cooler temps, and you don't want the
jar to explode inside your fridge. That would be very
bad!
Recipes
Google is your friend for recipes! You can also join
FB or other social media groups to see what other people are
fermenting at home. You can start out easy with just
vegetables & hot sauce, or you could dive way in with
sauerkraut, miso, and/or kimchi. The fermentation
world is your oyster, so pick what works for you and see
what you come up with! |
|
|
|
I was probably the most excited to try making my own
fermented hot sauce after playing around with some peppers,
carrots, and cauliflower. After looking at a few
recipes online, I decided to try out a red and a green
fermented hot sauce to see how that worked out.
Overall, I liked the flavor of both sauces, but I need to
get a better handle of how to season the sauce as I'm
blending it together. I may also try heating the sauce
to pasteurize it next time potentially, and this would also
allow me to potentially toast some spices to add in as well.
Green Hot Sauce: Fresh peppers (bell, banana,
jalapeno)
Red Hot Sauce: Dried peppers (ancho, chipotle,
guajillo)
Additional Ingredients: Distilled water, white
vinegar, salt, and other spices to taste
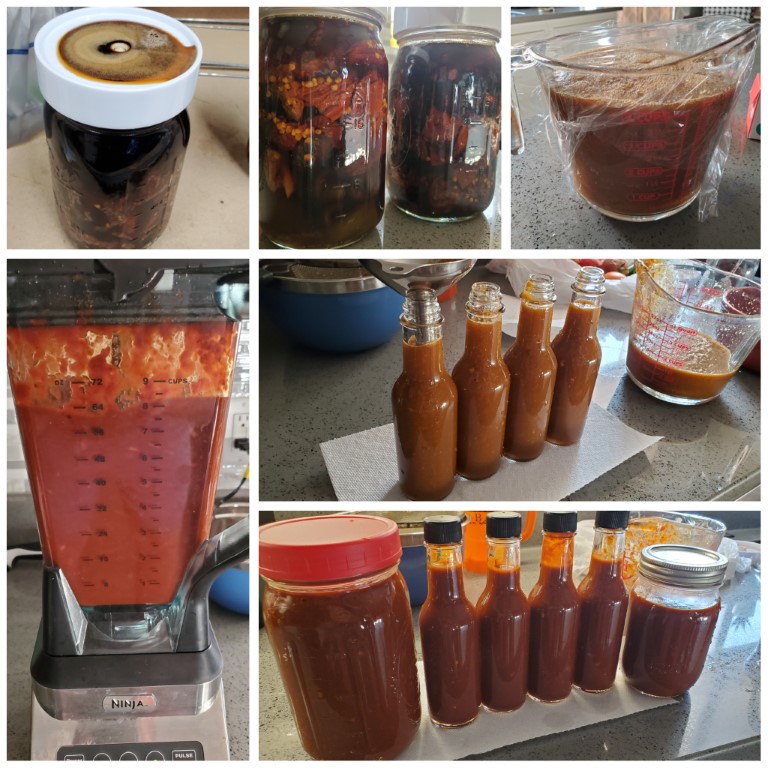
Process:
Ferment peppers
using the standard fermentation process listed above.
Once the peppers are at your desired level of fermentation,
strain the peppers, but be sure to reserve the fermentation
liquid. You can then add some of the fermentation
liquid, white vinegar, distilled water (if needed), salt,
and other spices to your personal tastes. I didn't do
a good job of keeping notes on these two batches of hot
sauce, as I was trying to play around with flavors and see
hot things turned out. Next time around, I'll try to
keep better notes. Below are links to some hot sauce
jars & funnels that I used to store the sauce along with the
different dried peppers I used on my red sauce:
|
|
Contact Information:
MikeYoungHB
at gmail.com
*As an Amazon Associate I earn from qualified purchases*
|
|