|
Keg Washer Build Sites:
Commercial (homebrew) Keg Washer for Reference:
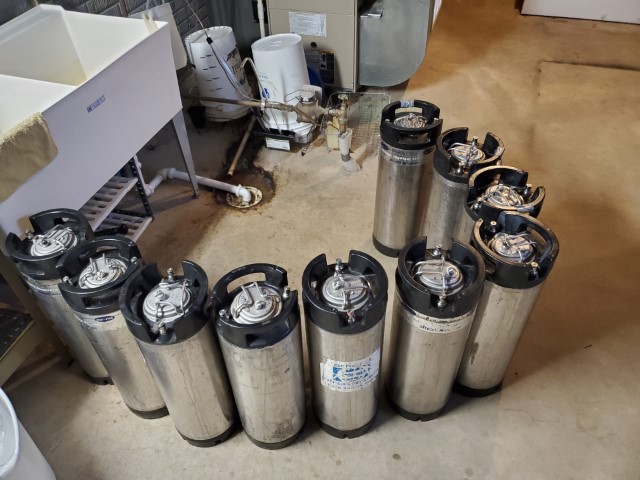
I was bored the other day, so I decided to clean a bunch of
my dirty/used kegs so they were ready for the next time I
need to keg a couple beers. A couple hours later and a
store back, I had cleaned and sanitized kegs, but I realized
that it's time for a more automated and less labor-intensive
way to accomplish this task. After talking to a few
fellow homebrewers, I realize that my process is a bit more
thorough than theirs, as a lot of them don't take off the
keg posts and fully clean and sanitize those, which boggles
my mind. Here's what I'm currently doing to clean and
sanitize my kegs:
-
Add 1/2
gallon hot water to keg to clean out most of the
sediment, shake, and dump
-
Add 1/2
gallon hot PBW, shake, scrub with toilet brush
(dedicated to brewing, not the toilet)
-
Add 1/2
gallon hot water, shake, dump
-
Add 1/2
gallon StarSan or Iodophor, shake
-
Remove keg
posts & poppets and clean with hot water and soak in
sanitizer
-
Remove dip
tubes, clean with brush, and soak in sanitizer
-
Add dip
tubes, poppets, and posts to keg
-
Dump out
sanitizer
-
Repeat for
remaining kegs - I usually line up several at a time, so
this goes a little faster for multiple kegs, but still
not super efficient.
As you can see,
there is a lot of bending, shaking, cleaning, and overall
effort involved in this process. So I decided to do a
little online research on various keg washer builds and see
what I could put together based on my needs. A lot of
the sites I found were also using this keg washer to clean &
sanitize carboys as well. I use mainly buckets and
only do primary fermentations on the majority of my beers,
but I do have a few Better Bottles for long-term aging and
for use with my sour beers, so this wasn't as big of a
factor in my build.
NOTE:
After doing some testing, my keg washer works with Better
Bottles and the CIP ball fits through the neck just fine.
Even after
getting a good idea of the parts I needed by looking at
several other sites online, I still spent about an hour at
Menards just putting various pieces of PVC together to see
what I thought would work best. I ended up buying a
few extra parts here and there, but the list below should be
pretty close to what I actually used on the build. I
wanted the keg washer to screw apart in a few places, in
case I want to store it more disassembled in order to dry
better. I still haven't figured out the best way to
dry this out after use to prevent mold from potentially
growing inside, but I'm sure I'll come up with something
after I use it a few different times.
| Quantity |
Part |
Link or Location |
| 1 |
Superior 1/4 HP Submersible Pump |
Amazon |
| 1 |
1/2" Stainless Clean-in-Place (CIP) Ball |
Amazon |
| 1 |
4" to 3" PVC Reducing Coupling for lid (Added
later) |
Menards |
1 |
3/4" PVC Swivel Adapter (Male)
* I ended up removing this piece and just screwing
the spray wand directly to the pump, since I was
having issues the adapter coming apart during
cleaning. |
Amazon or
Lowes |
| 1 |
3/4" PVC Female Adapter |
Menards |
| 1 |
3/4" PVC Cross |
Menards |
| 2 |
3/4" x 1/2" PVC Female Elbow |
Menards |
| 2 |
1/4"ID x 1/2" MIP Hose Barb |
Menards |
| 1 |
1/2" x 3/4" PVC Male Adapter |
Menards |
| 1 |
1/2" PVC Coupling |
Menards |
| 1 |
1/2" x 18" PVC Riser |
Menards |
| 1 |
3/4" x 5' PVC Pipe (cut to different lengths for
project) |
Menards |
| 1 (each) |
PVC Cleaner & PVC Cement |
Menards |
| 1 |
1/4"ID x 10' Vinyl Tubing |
Menards |
| 1 (each) |
Liquid & Gas Keg Disconnects (Ball or Pin Lock) |
Amazon |
| 4 |
Hose Clamps |
Menards |
| 1 |
Old Homebrew Bucket & Lid |
Home or store |
| 1 |
GFCI Adapter |
Amazon |
| 2 |
2x2 piece of wood to stead keg on top of lid
(Added later) |
Menards |
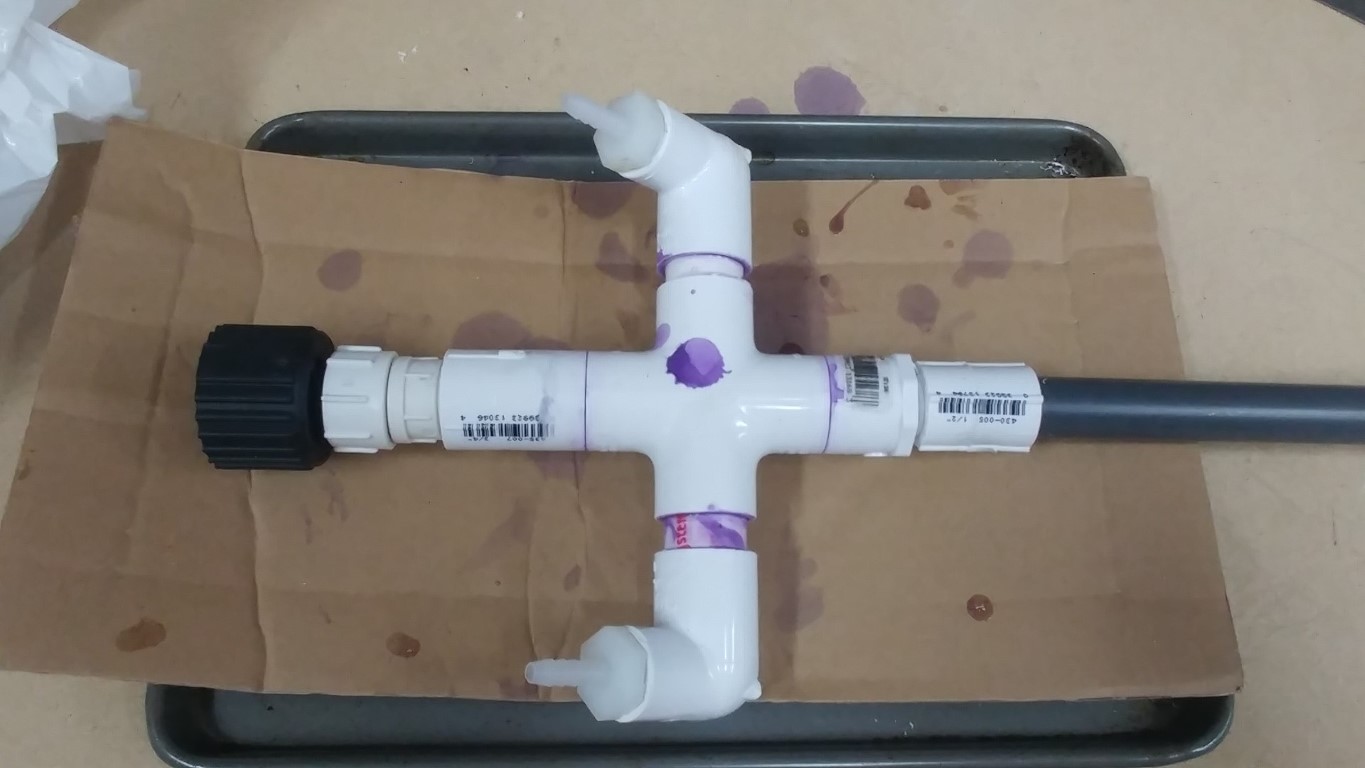
The first thing I did once I had all my parts together was
to lay everything out to make sure there wasn't anything
missing. I still needed to cut some pieces of 3/4" PVC
to size in order to join various parts together, so I
figured out how much overlap between parts was needed and
tried to cut the PVC as short as I could to get things to
fit tightly together. I used a reciprocating saw (Sawzall)
to cut the PVC to length. You could use a hand saw for
this as well, but it will take a little longer. I
lightly sanded each piece afterwards to remove any plastic
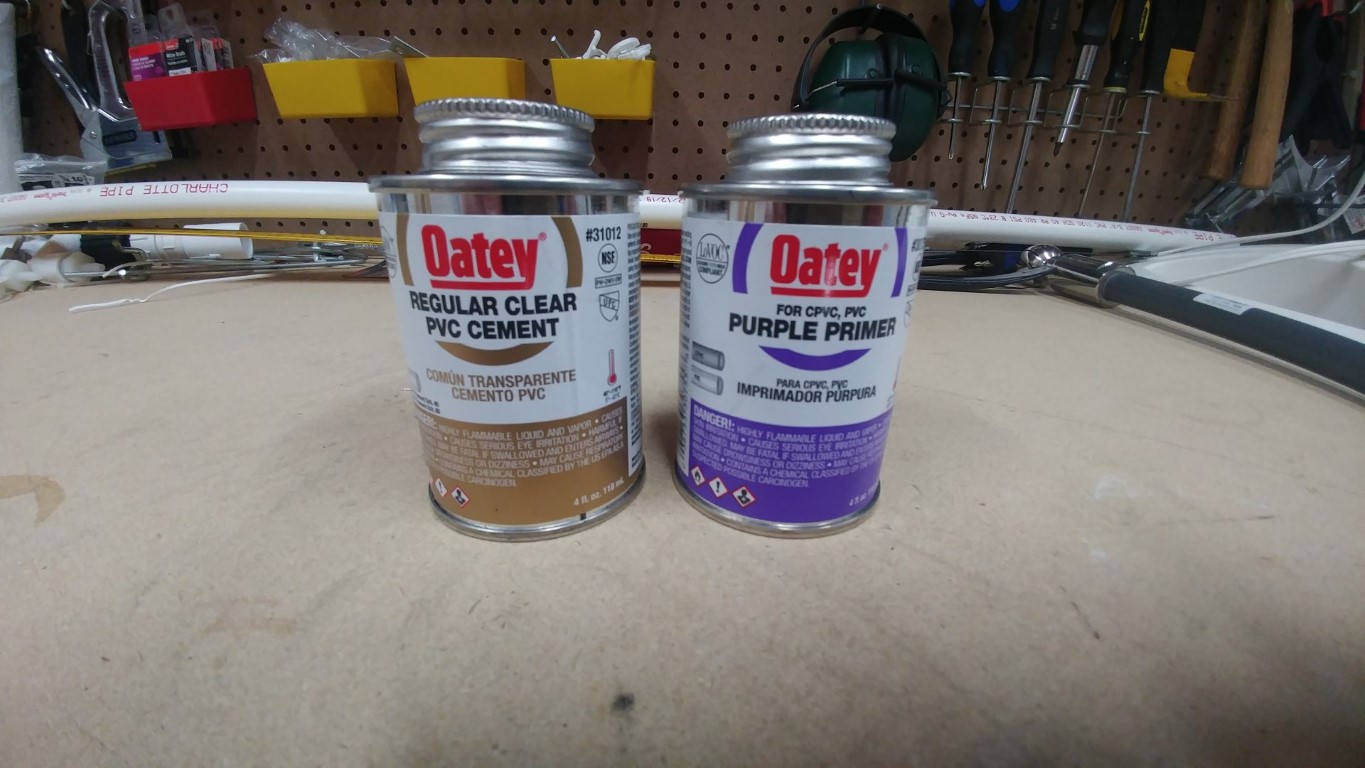
burrs left from cutting. After that, I applied the
purple PVC primer to the outside of the PVC pieces and
inside of the various other parts. As you can see from
the pictures below, this stuff is messy and will stain
anything it touches. It's best to use a piece of
cardboard or something to cover your workbench so you don't
end up with a permanent stain like I did. Once the
pieces are primed, you can apply the PVC cement to the
outside of your PVC pieces and inside of your female parts.
This stuff sets up very quickly, so be sure to use enough
pressure to quickly get the pieces together and wipe off any
excess PVC cement.
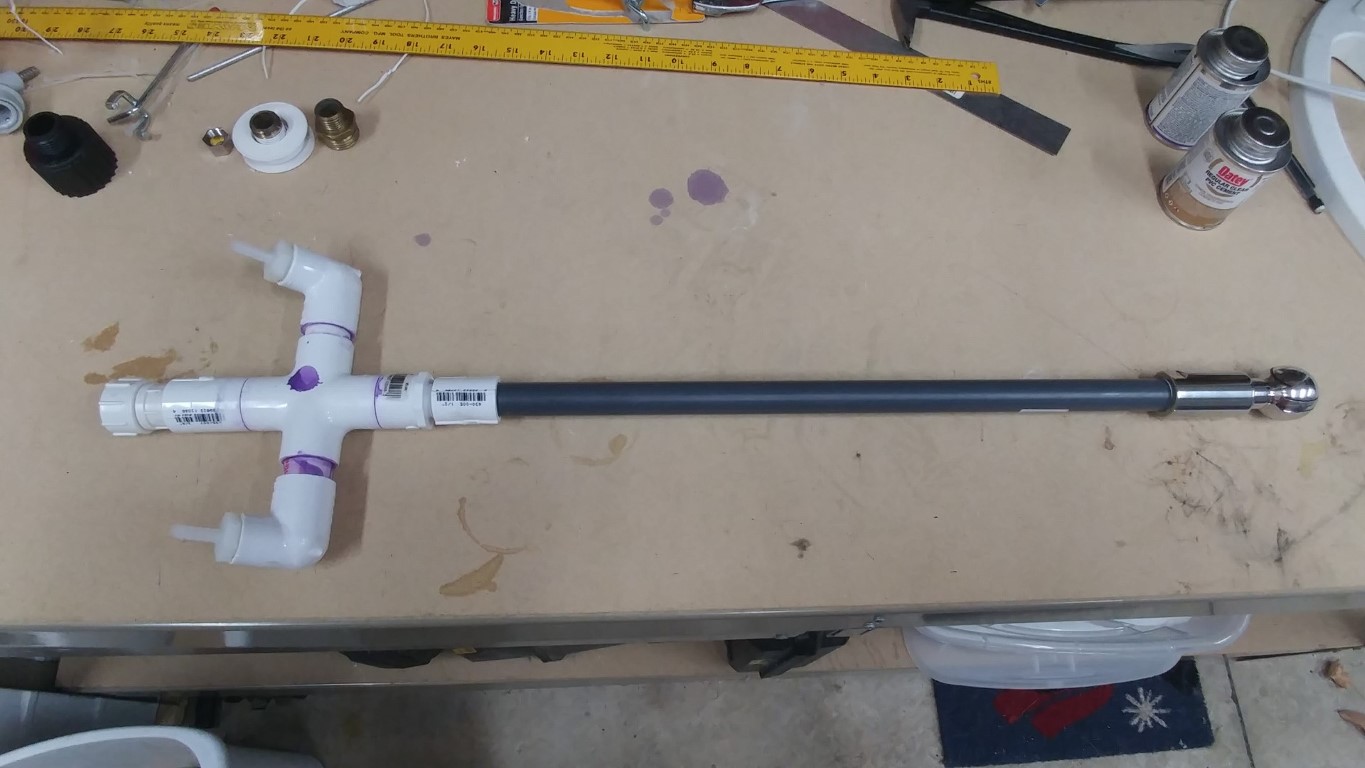
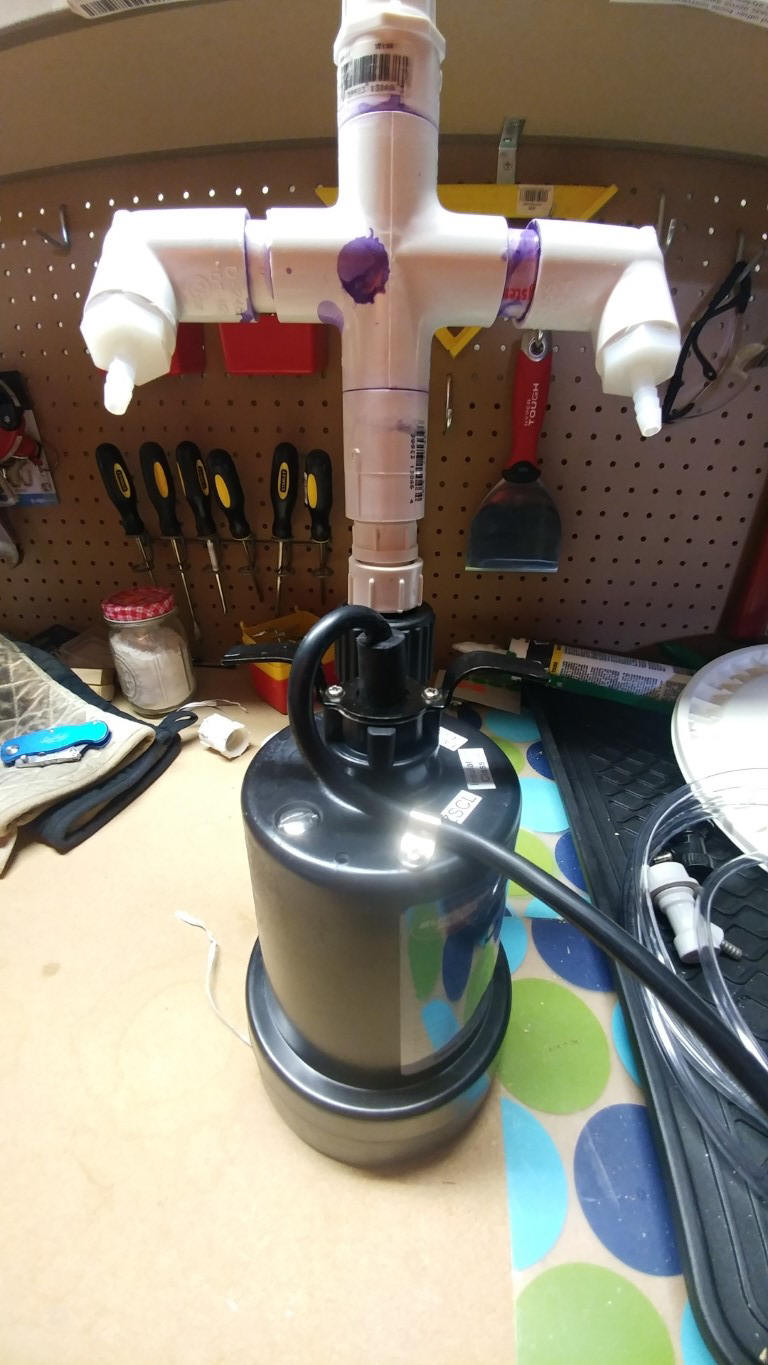
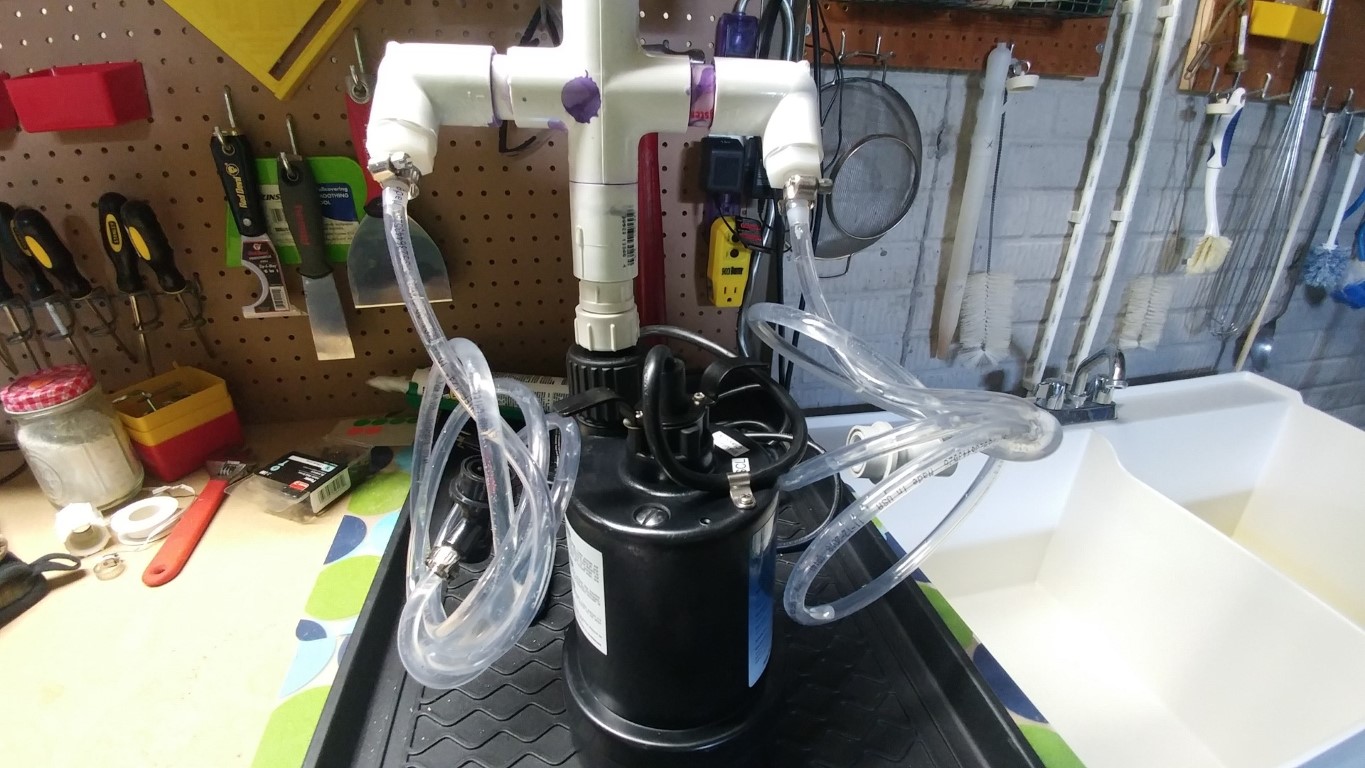
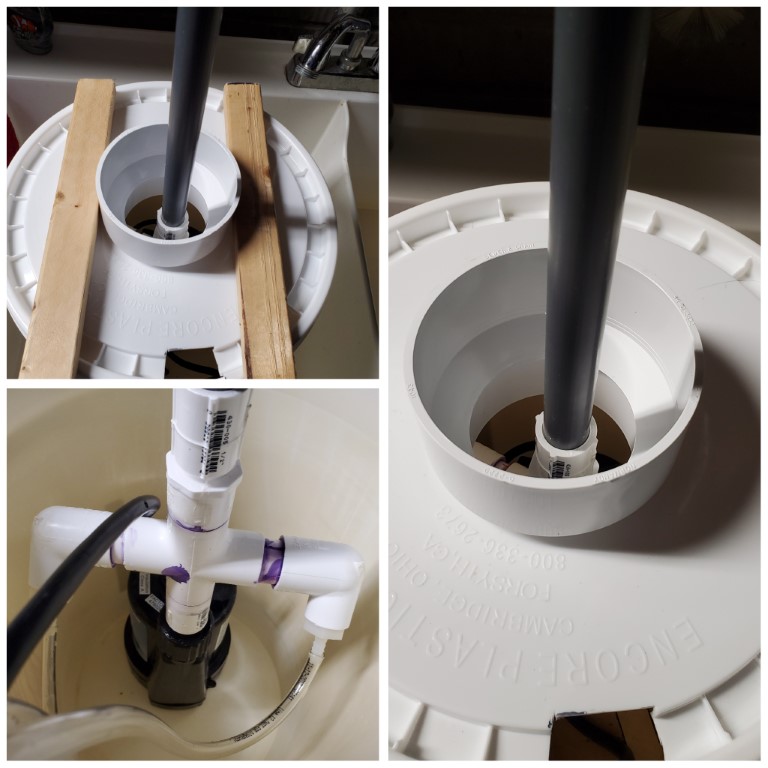
After the spray
wand is put together and dry, it's time to get it hooked up
to the pump, attach the tubing and disconnects for cleaning
out the keg dip tubes, and cutting the bucket lid. I
used about 4' of 1/4" tubing for each side of the T used for
cleaning out dip tubes. This is longer than some other
how-to sites, but I wanted there to be enough extra length
so I wasn't having to hold the keg up in the air to connect
the quick disconnects. If you've ever put together a
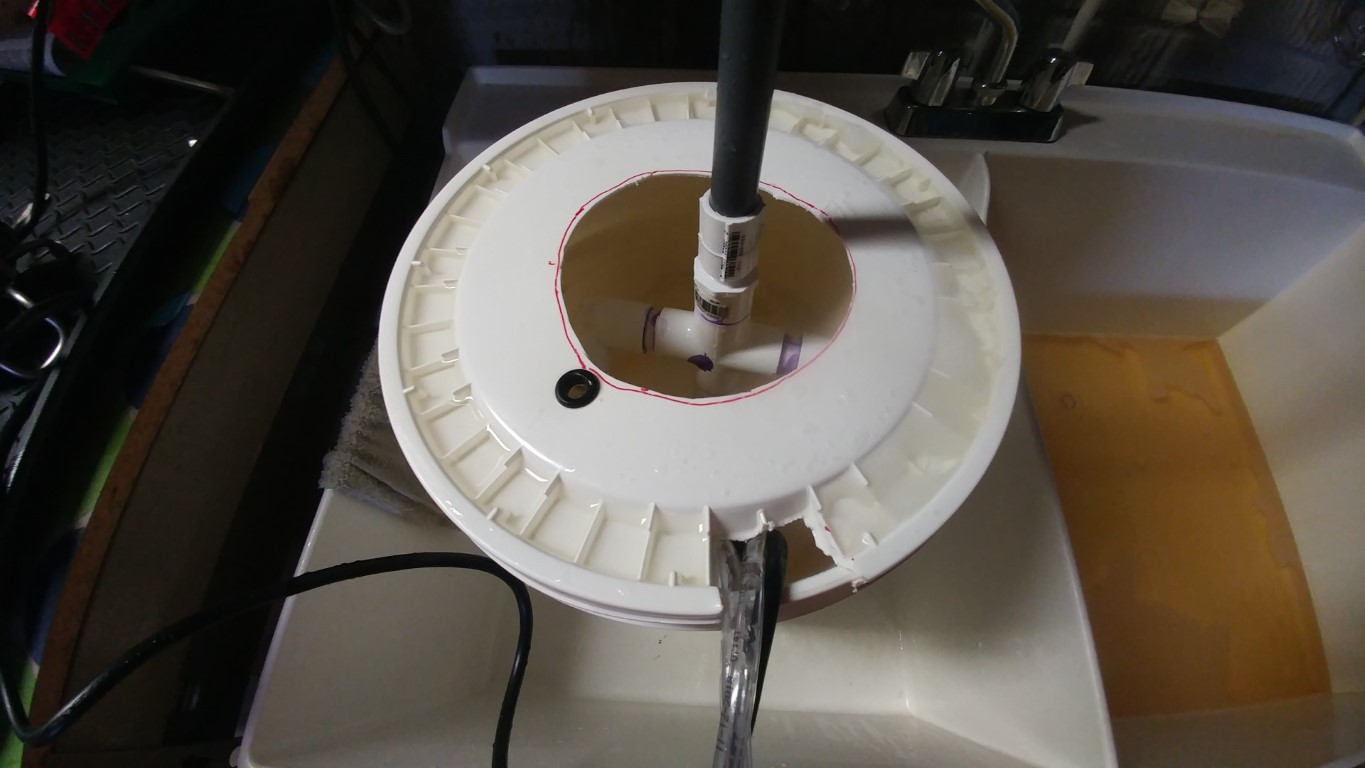
kegging system, this part should be pretty easy. After
that, it was time to cut the bucket lid. The hole you
cut will need to be large enough to allow cleaner &
sanitizer to drain back into the bucket, but not so large
that the keg handles fall through. My cuts definitely
aren't the prettiest, but they get the job done. I
also needed to cut a notch in the side of the lid to allow
the pump power cord and tubing to fit through. I just
used a pair of sheet metal cutters for this. I could
have probably used power tools, but it was easy enough to do
by hand.
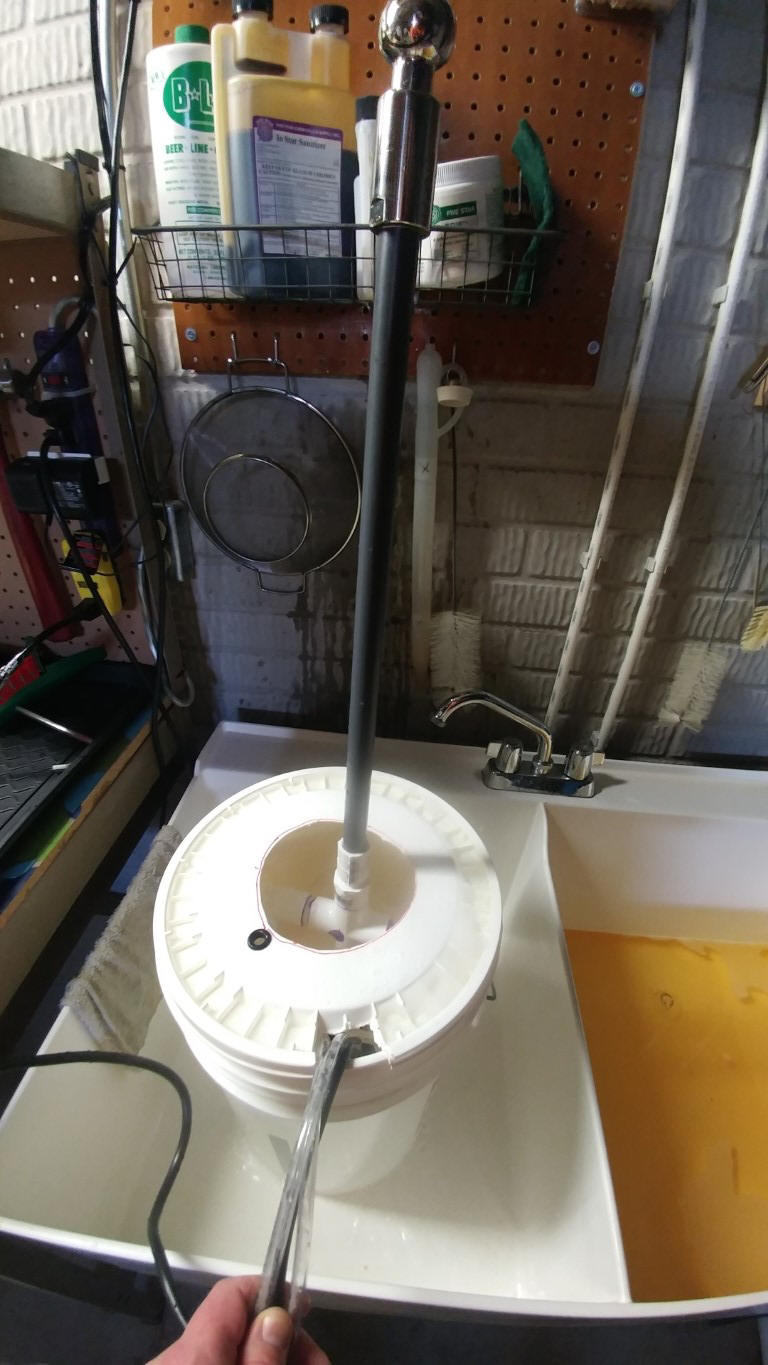
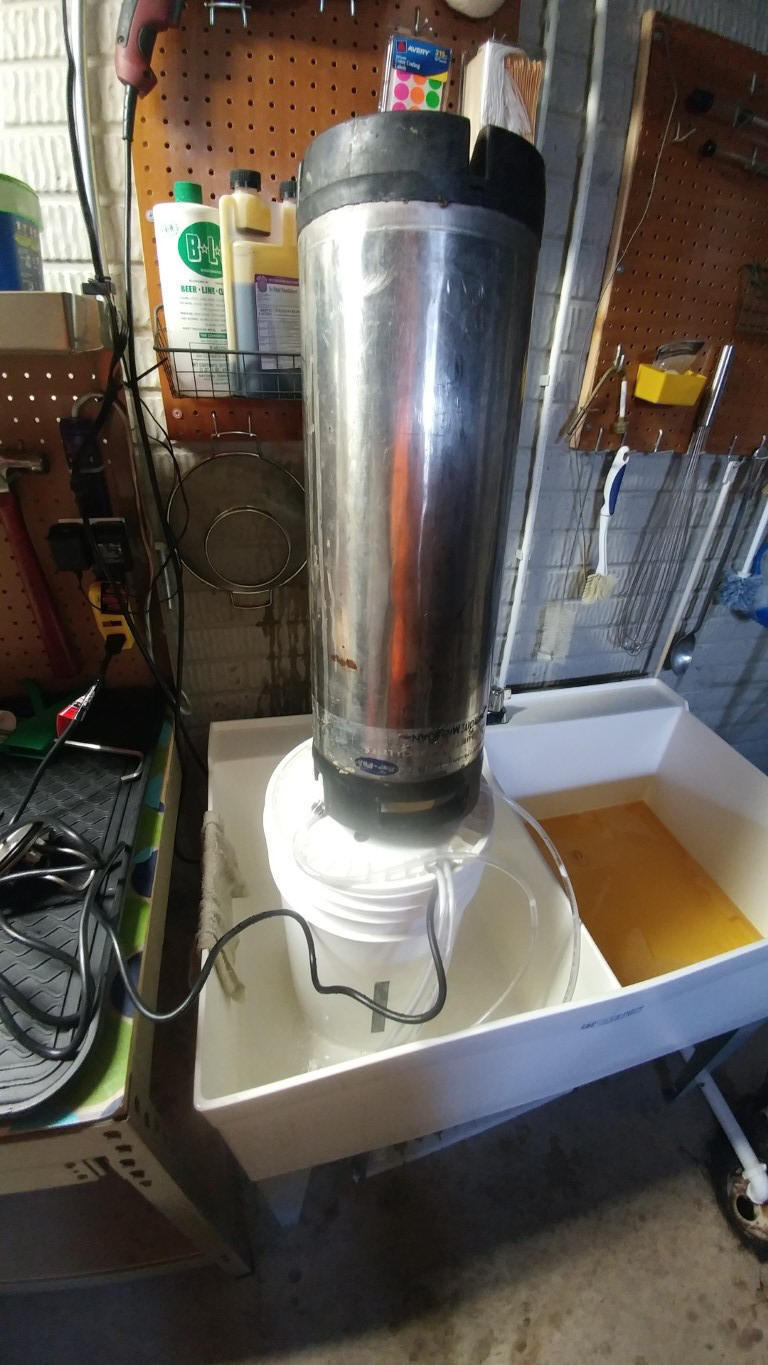
Once everything
is hooked up and ready to go, it's time to test it out.
I filled my bucket with 2 gallons of hot PBW solution, put
the pump and spray wand in the bottom of the bucket, and
then put the lid on, being careful to get the power cord and
tubing through the notch in the side. I connected the
gas and liquid disconnects to my dirty keg, and flipped the
keg on top of the spray wand. At this point, I was
ready to turn it on and see what happens.
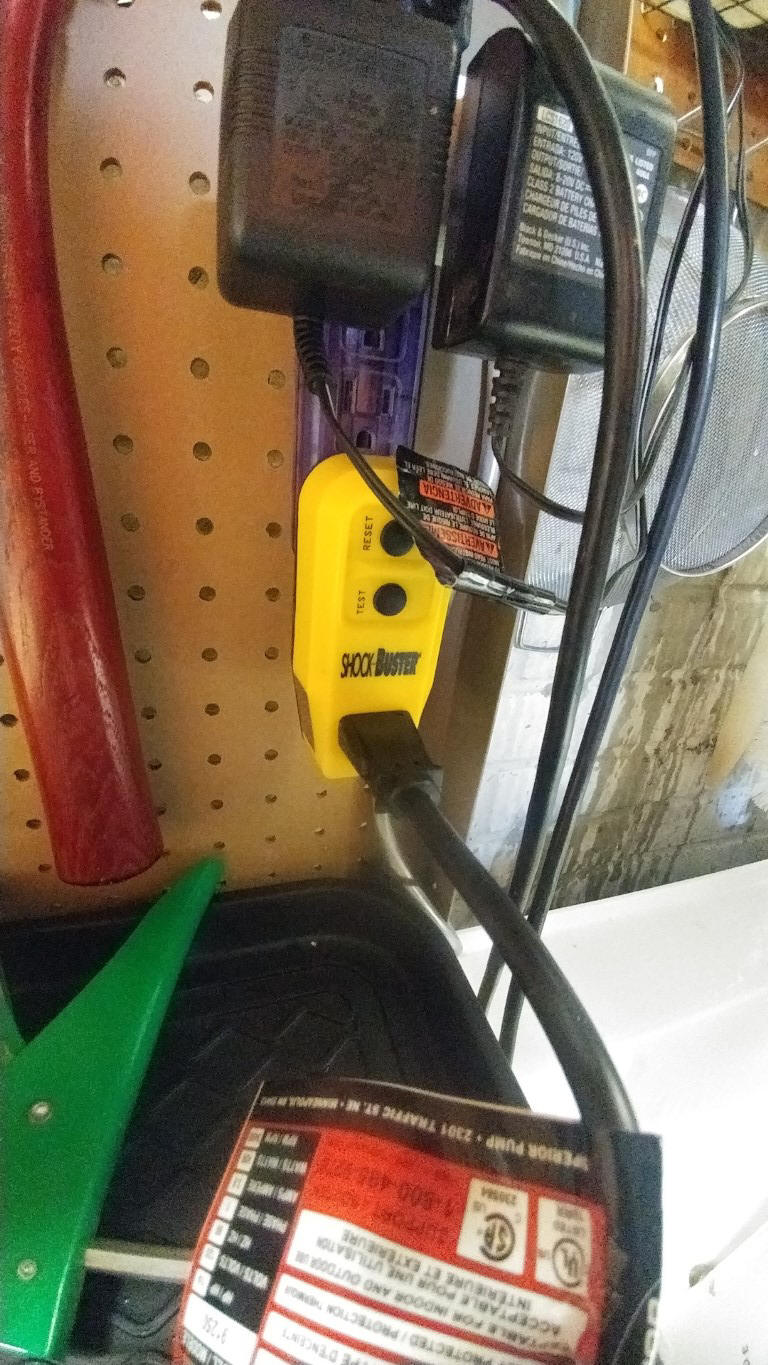
**Make sure you are using a GFCI
outlet, or better yet, a GFCI adapter since you're working
with electricity and water** My outlet was
already GFCI, but I like the adapter because I can turn the
power on and off easily to the pump for switching out kegs
without needing to physically unplug the pump. Luckily
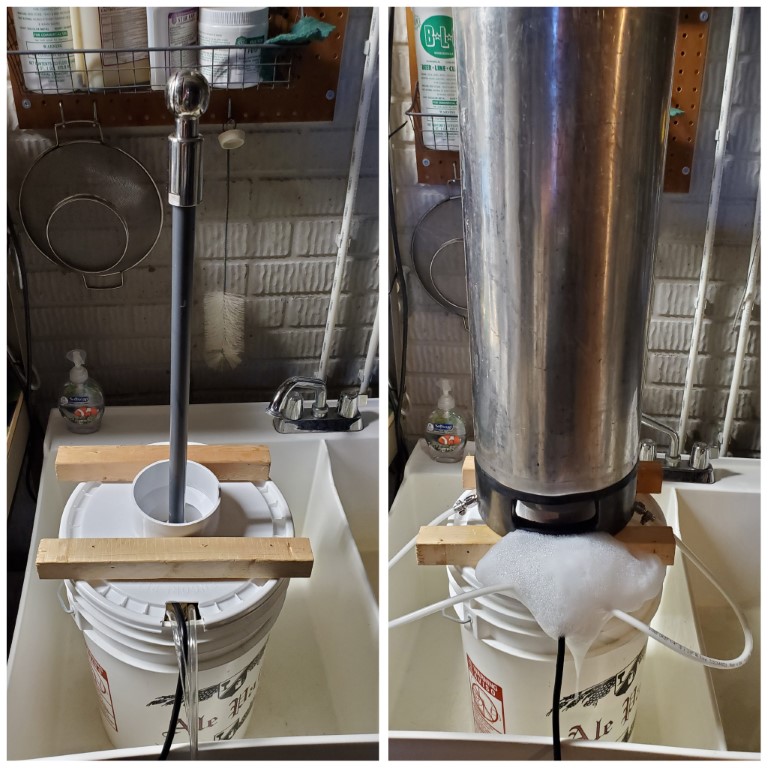
for me, everything worked pretty well for the initial test.
Some of the PBW was draining outside the hole in the lid,
but not a ton. I'm planning on running this in my brew
sink, so that's not a big deal. I also found that the
pump with the spray wand attached was unbalanced and really
didn't want to stay upright. As a quick workaround for
that, I found a long plastic twist-tie and used the existing
airlock hole in the lid to secure the wand to the bucket
lid. Just to test that enough water pressure was
coming out of the CIP ball and disconnect tubing, I put the
keg on the floor and covered the CIP ball with a plastic
pitcher and turned the pump back on. There was a good
amount of water pressure coming into the kegs through the
disconnect cleaning tubing, and the CIP ball was spinning
around like crazy inside the pitcher. That's how I
ended up with a good amount of water on my basement wall, so
I think we're good to go there. And there you have
it...a completed keg washer build that's about the same
price as the commercially available model, but much more
powerful and adjustable for your needs.
* Keg Washer
Video 1 *
* Keg
Washer Video 2 *
|