|
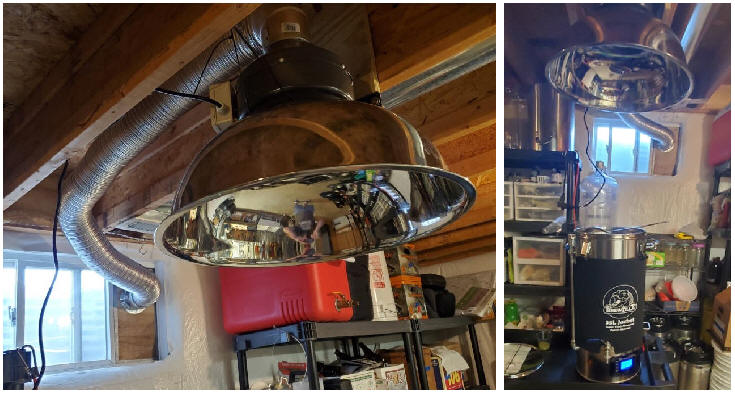
1. Start off by finding a good spot in your basement that's
close to a sliding window. I had a small window in the
unfinished portion of my basement where I had all my other
brewing stuff, so this worked out well. Once you have
a spot picked out, you can move forward with the fan build.
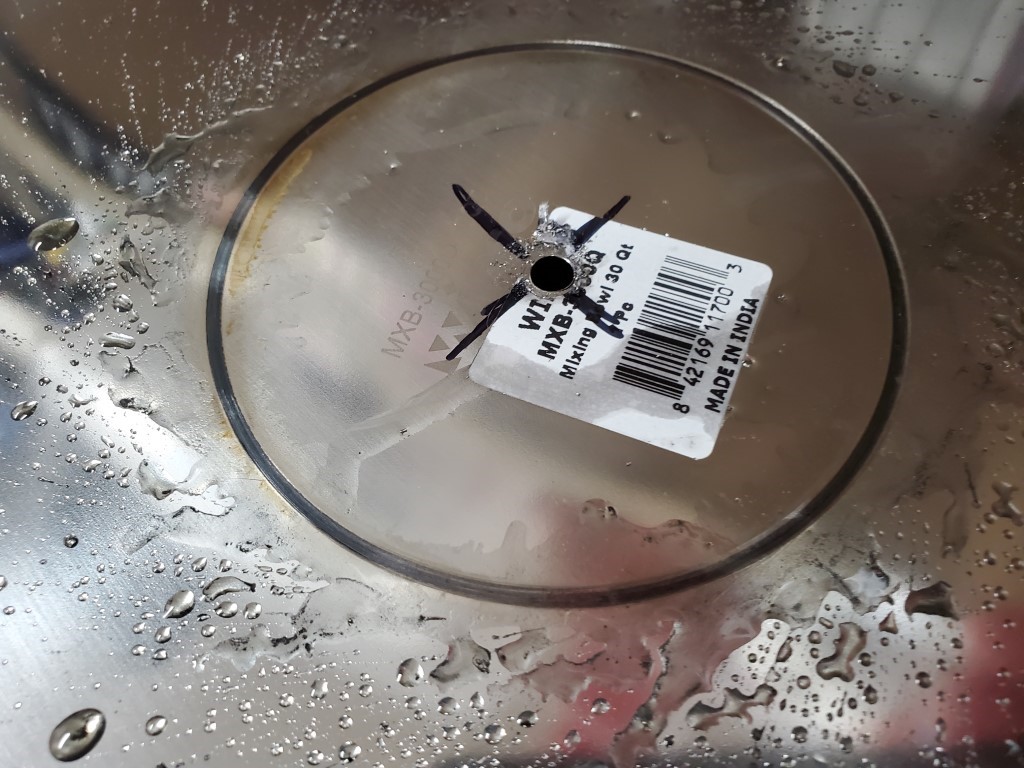
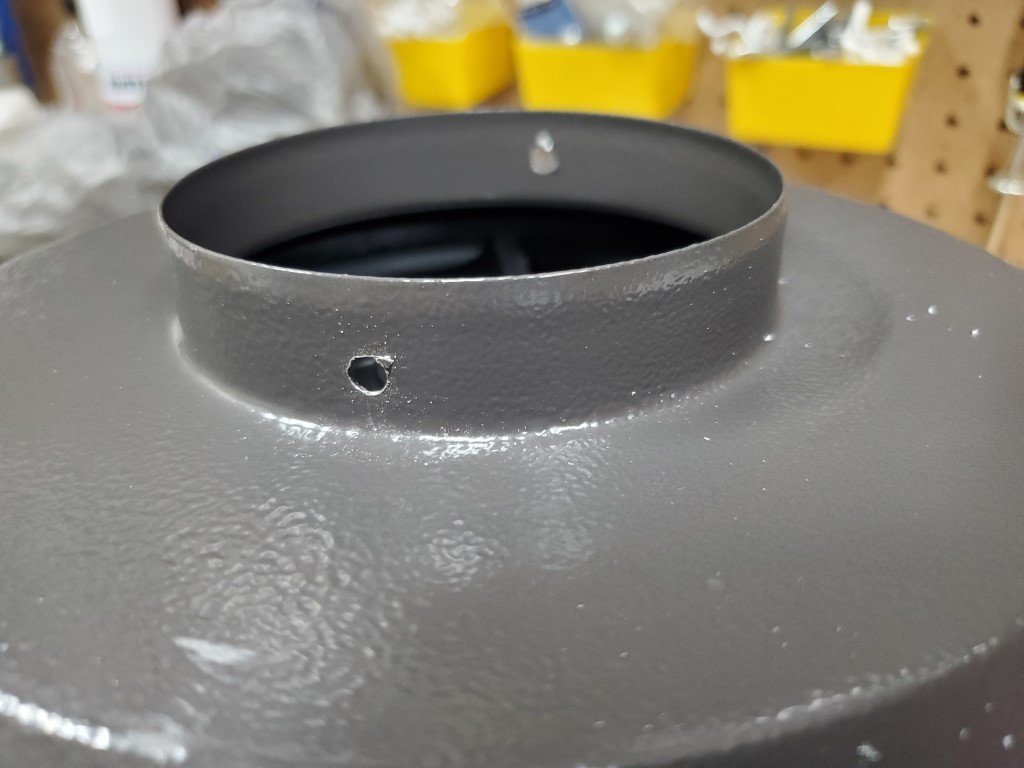
2. Cut a 4" hole in the bottom of the Stainless Mixing Bowl.
I tried using a metal hole saw and some cutting oil, but it
wasn't really working, so I switched to a cutoff wheel on my
Dremel tool and made quick work of cutting the hole.
You may also need to widen the hole a bit and smooth it out
in order to fit the Dryer Easy Connector.
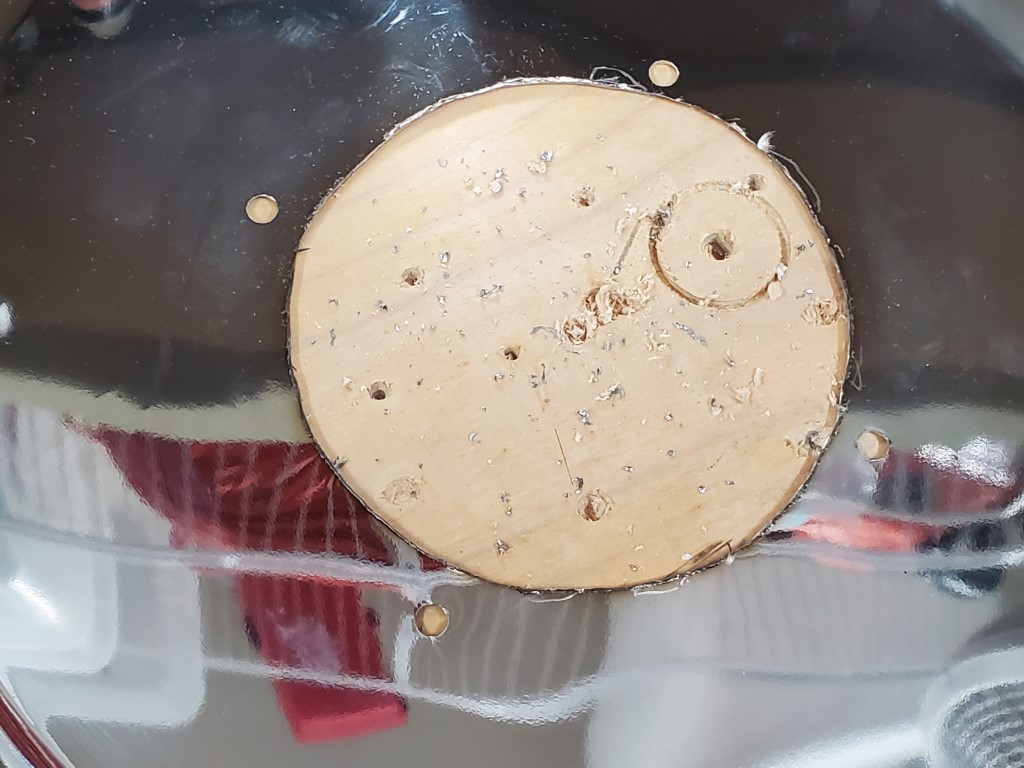
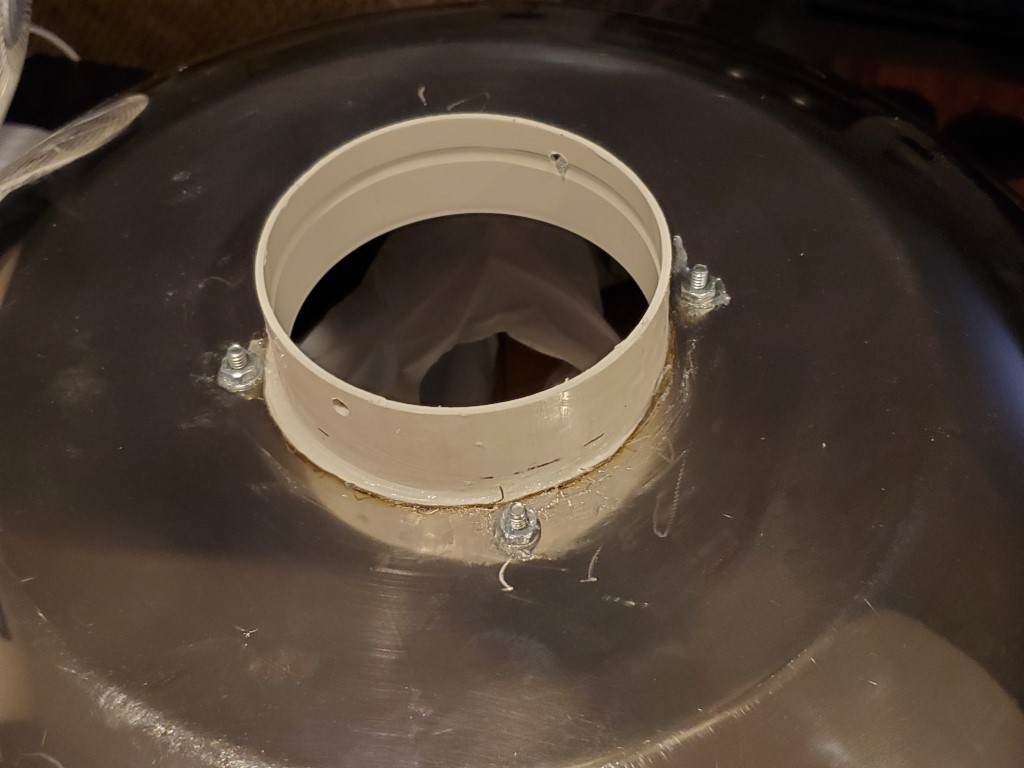
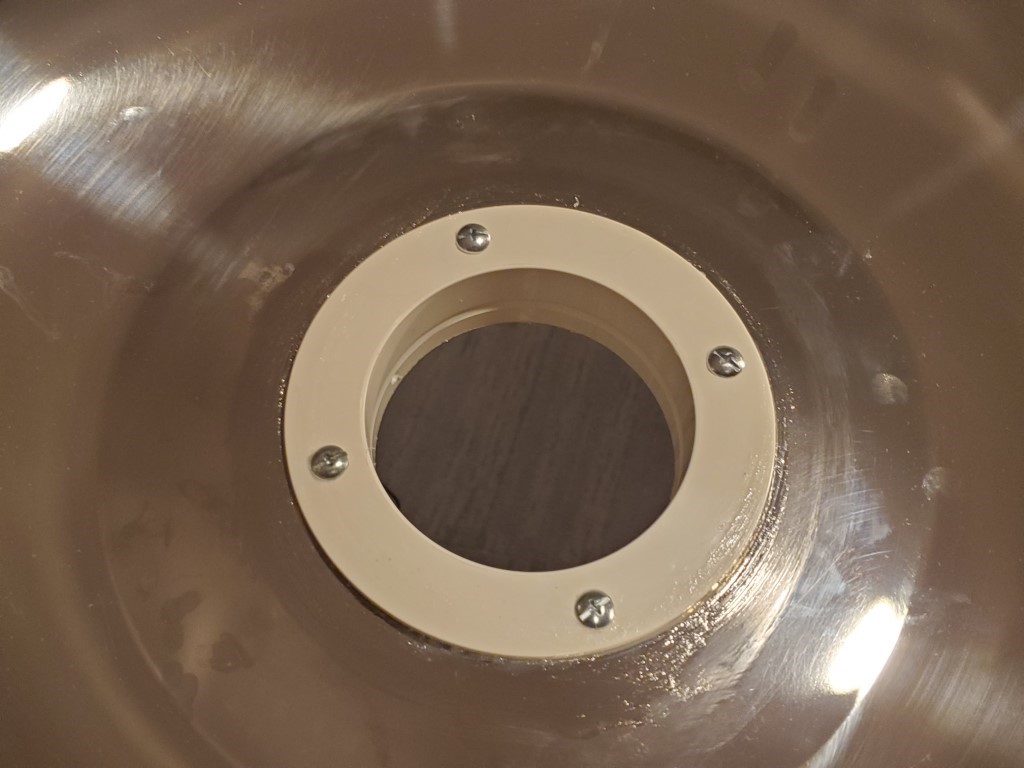
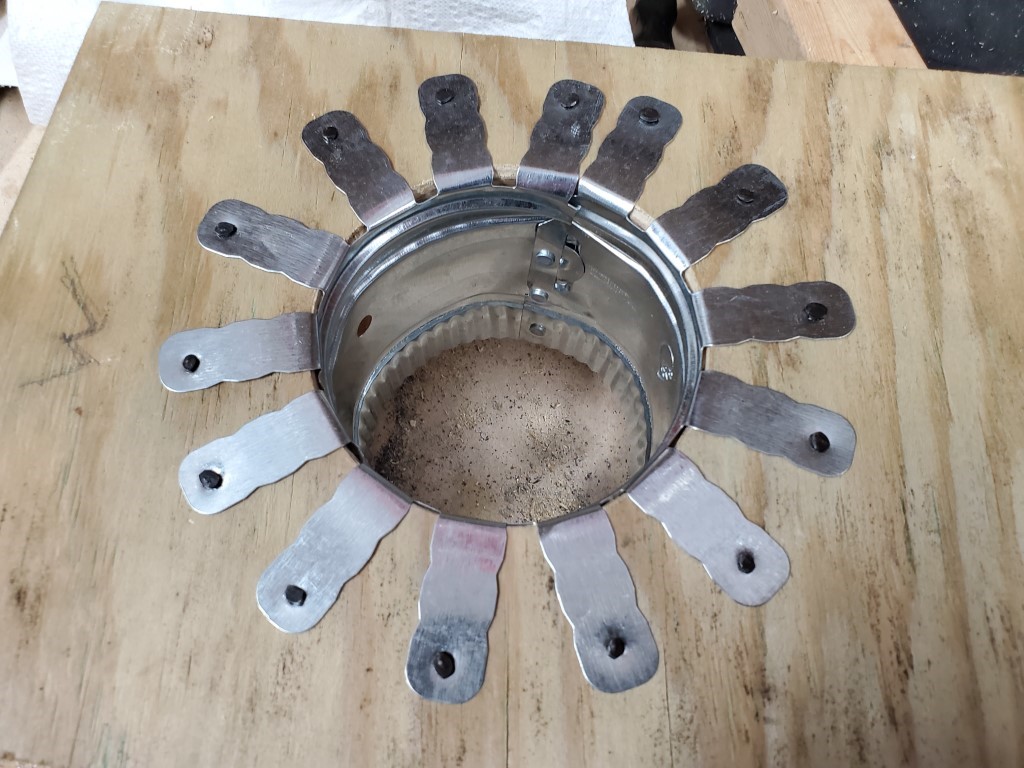
3. Fit the Dryer Easy Connector through the hold,
and drill 4 holes through both the PVC and the metal bowl.
Once the holes have been drilled, apply some silicone to the
inside of the Dryer Easy Connector that will come in contact
with the bowl, press the connector through the bowl, and use
bolts, nuts, and washers to tighten down the connector to
the bowl as seen in the images below. Smooth out any
extra silicone on the inside of the bowl to provide a good
seal.
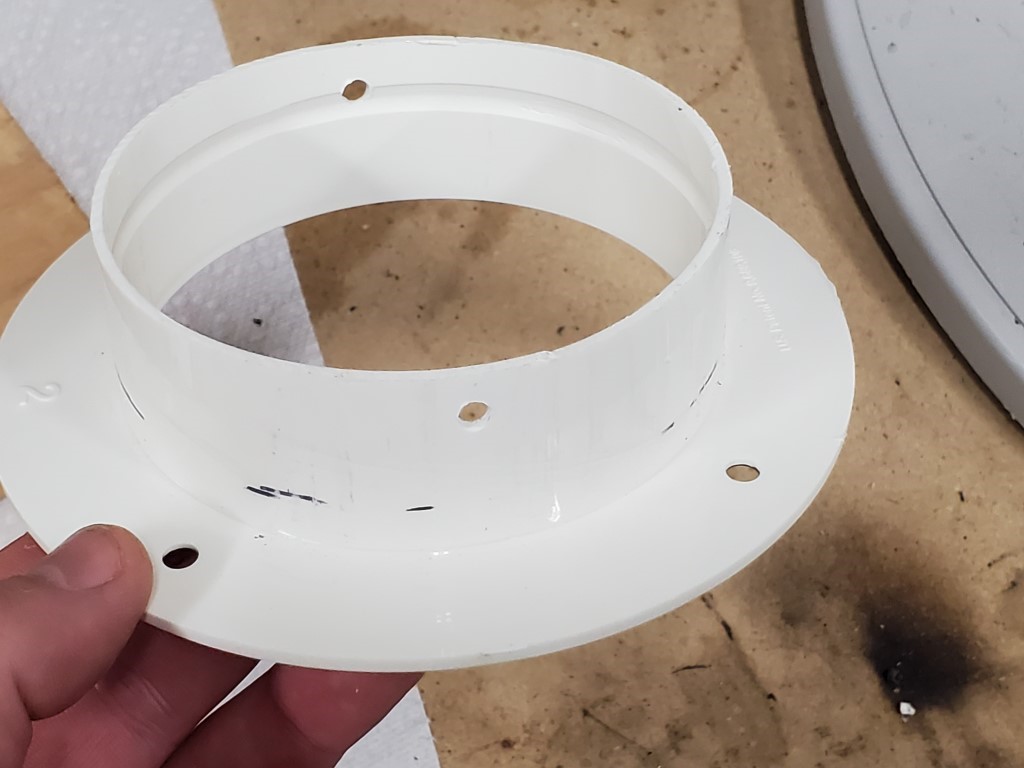
4. Drill two or three holes in the lip of the Dryer Easy
Connector and through the lip of the input side of the
Inline Duct Fan. This will be used to connect the bowl/hood
assembly to the fan once it's mounted.
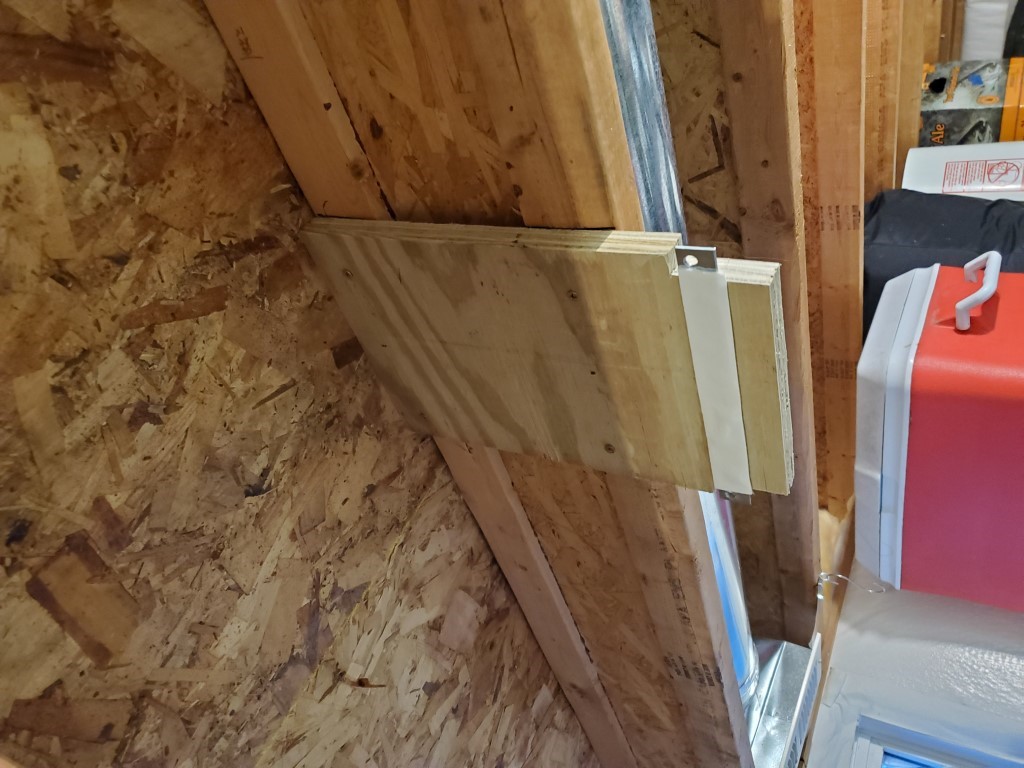
5. Cut a spare piece of plywood that will hang down
below the bottom of your rafters to mount your Inline Duct
Fan to. You will need to account for the height of
your fan along with the height of the 90 degree adjustable
duct elbow, so make sure you measure multiple times before
deciding how much wood you need. Also as you can see from my
picture, the spare piece of plywood I had wasn't quite wide
enough, so I had to add some straight metal braces to my
piece of plywood and attach the fan using bolts, washers,
and nuts instead of using wood screws. Once your piece
of plywood is in place use a level to make sure the fan is
straight and screw (or bolt) your fan to the wood.
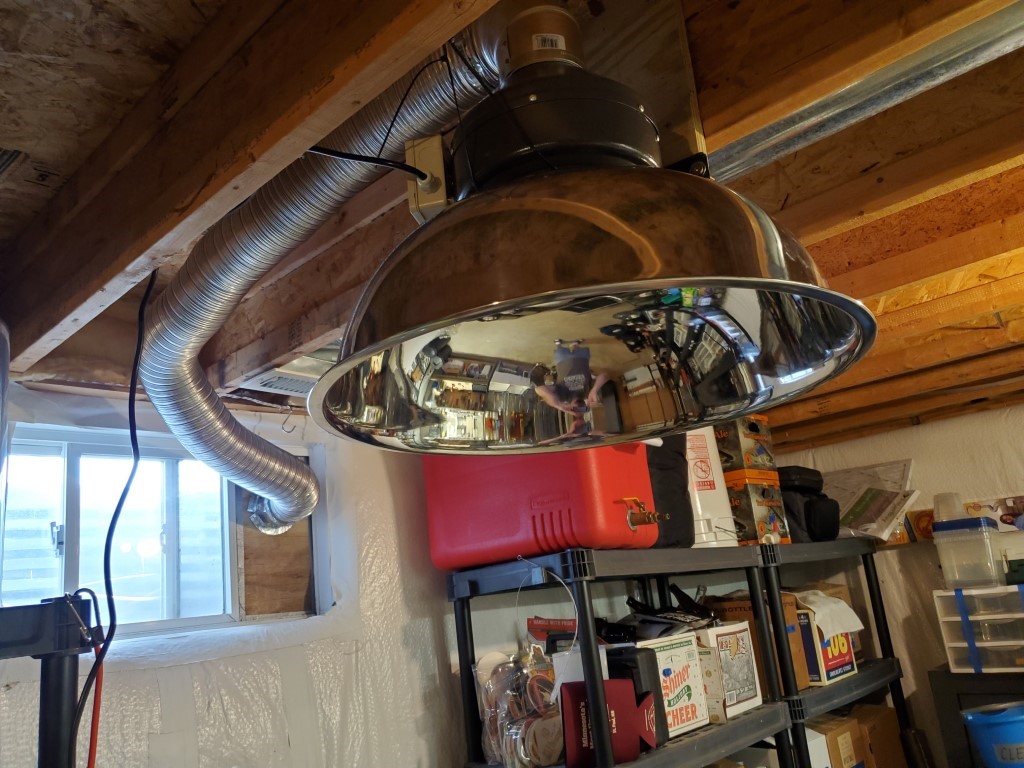
Once your motor has been mounted to the plywood, attach
your bowl/hood using bolts, washers, and nuts. Also
attach your 90 degree adjustable duct elbow and secure with
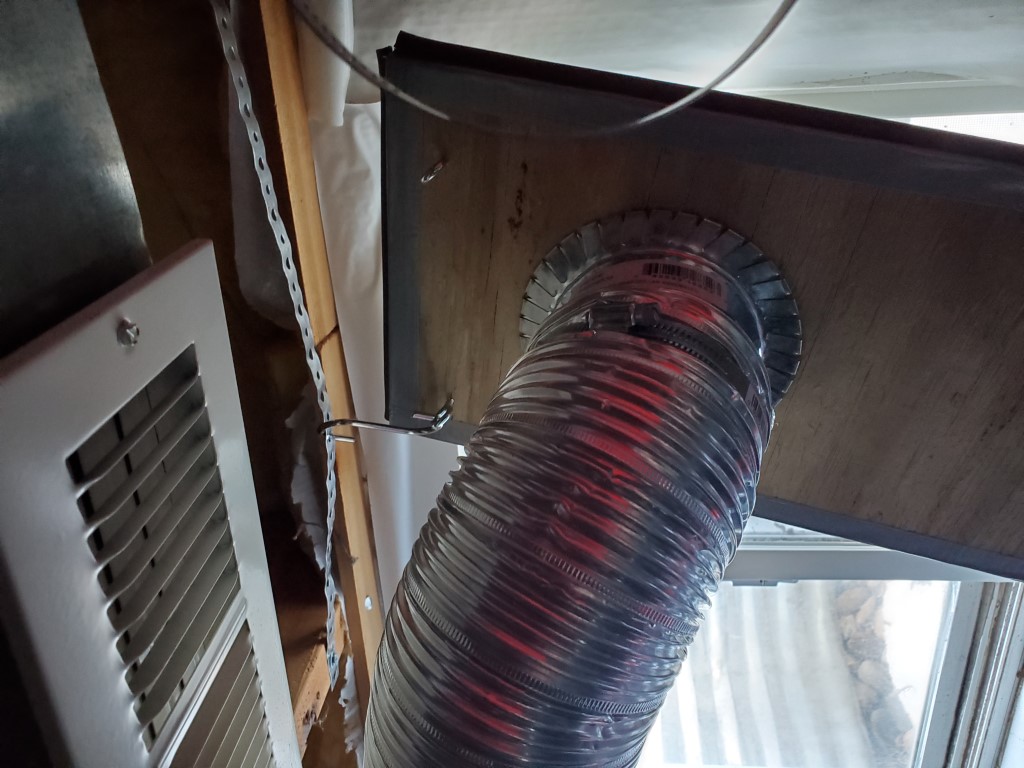
a worm clamp. NOTE: Once the fan and bowl/hood
were mounted, I noticed it wanted to lean a little towards
my board due to the weight. I ended up fixing this by
installing an eye screw in the opposite rafter and using a
couple zip ties to create tension to help keep the bowl/hood
level. This seems to be working pretty good so far, so
I haven't had to make any alterations yet.
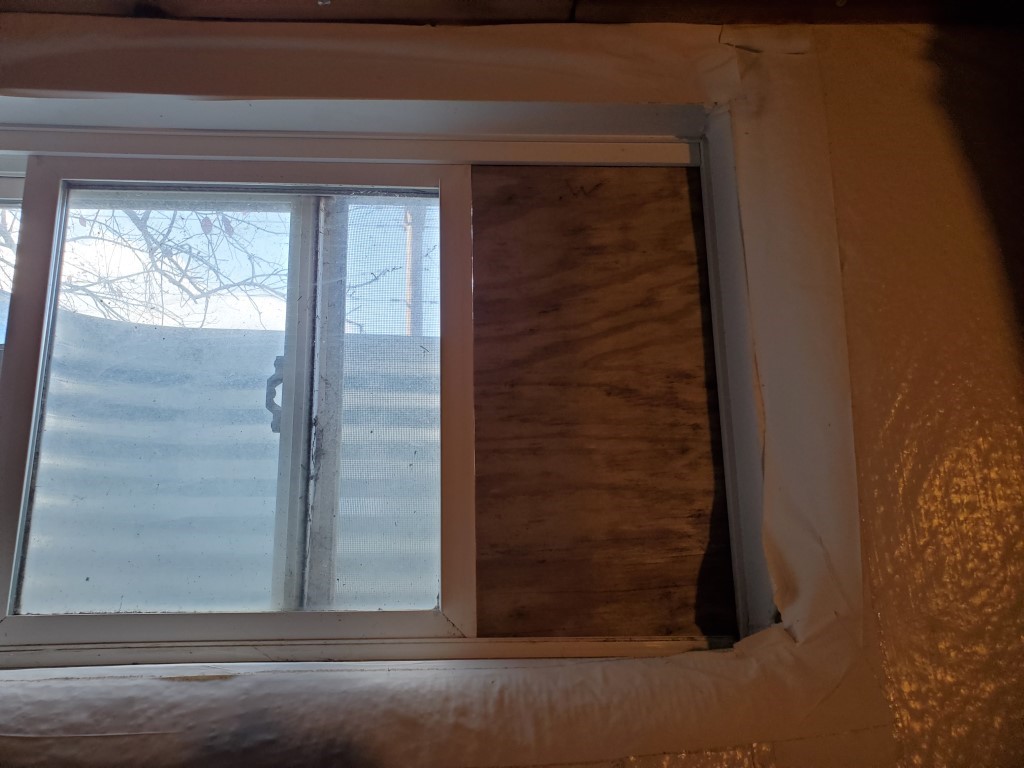
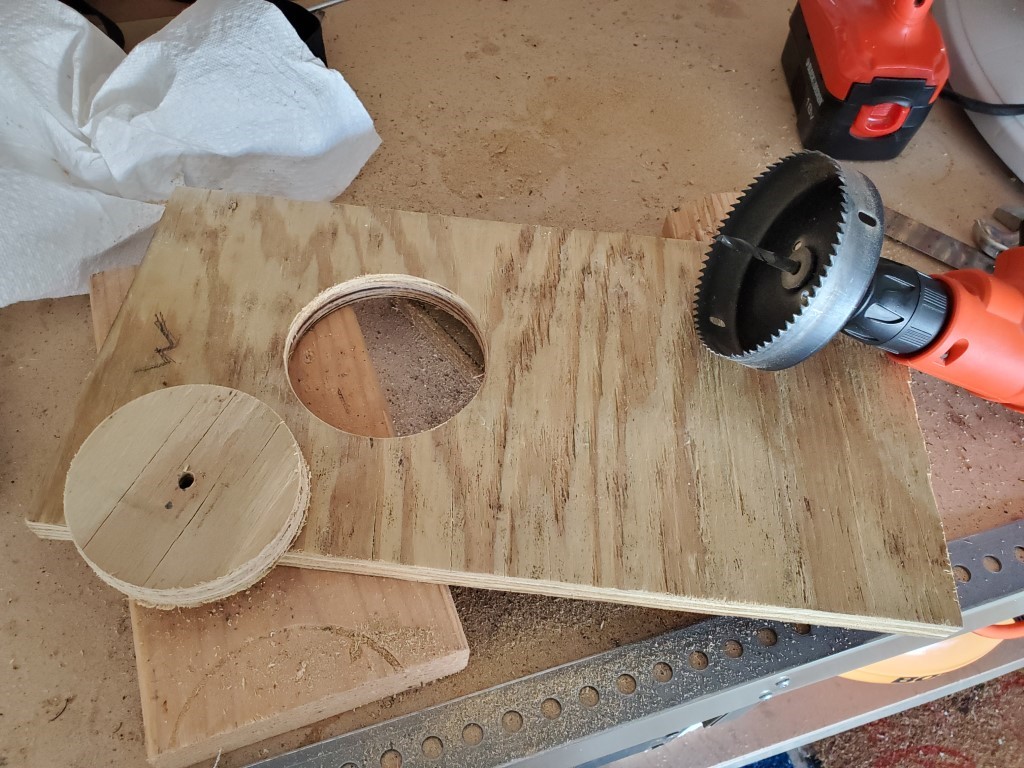
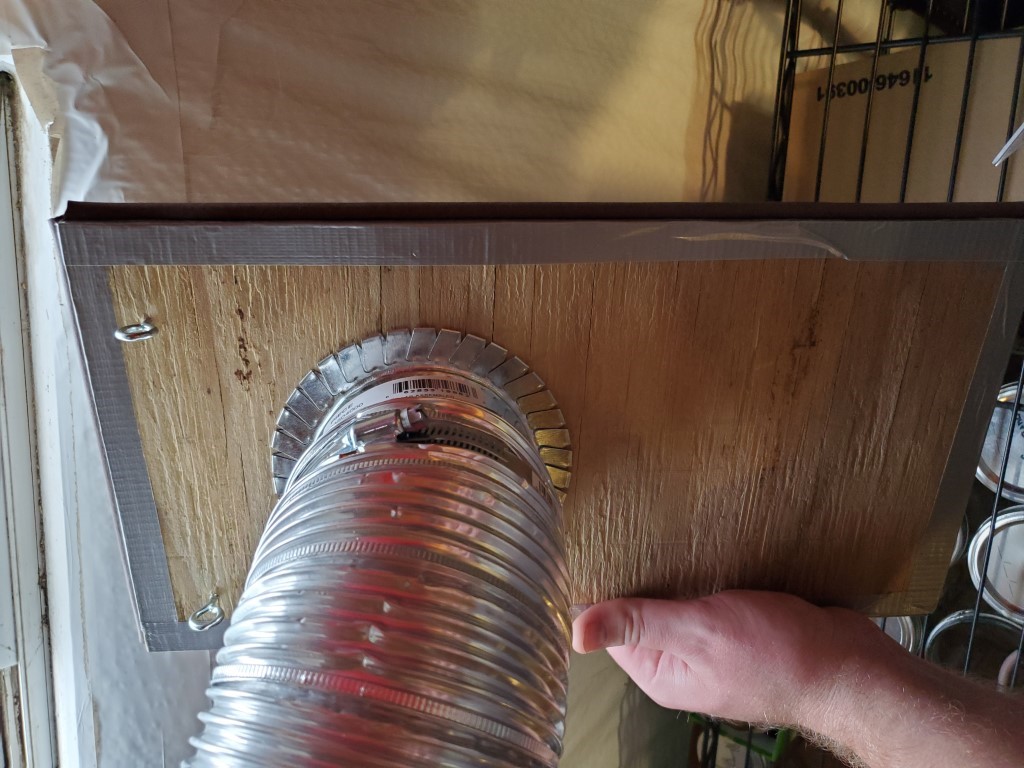
6. Measure and cut a piece of plywood that will fit
inside your window that you will vent out of. Mine
goes in at an angle and sits nicely inside the window well
so I can slide the window up against it to hold the wood in
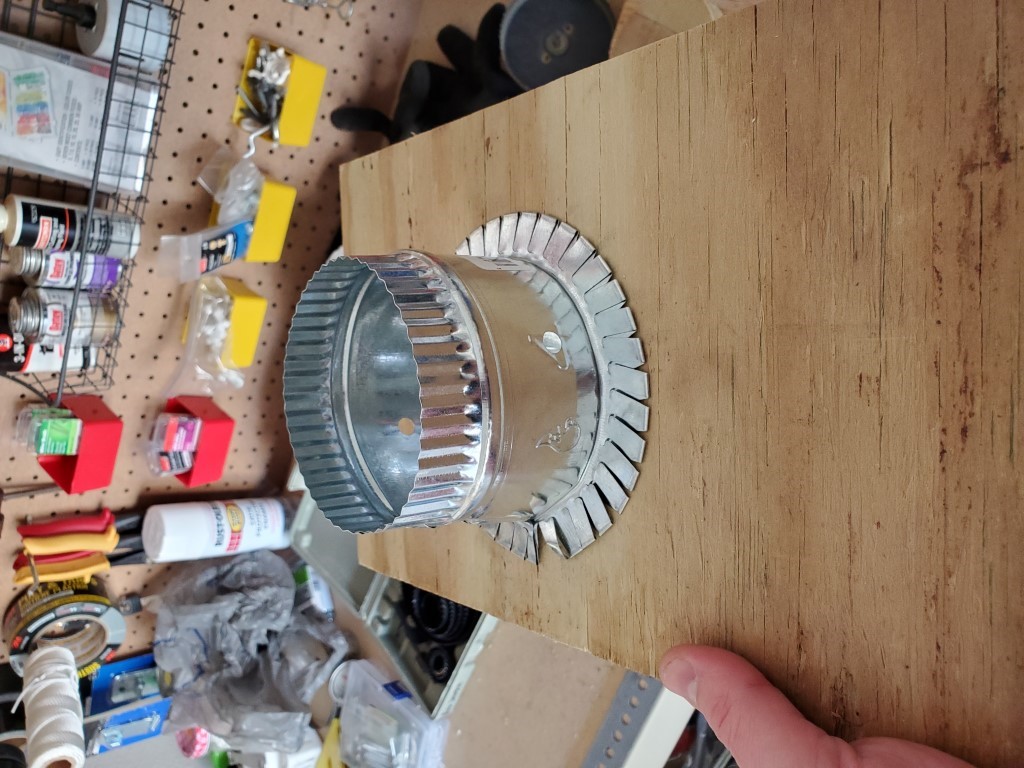
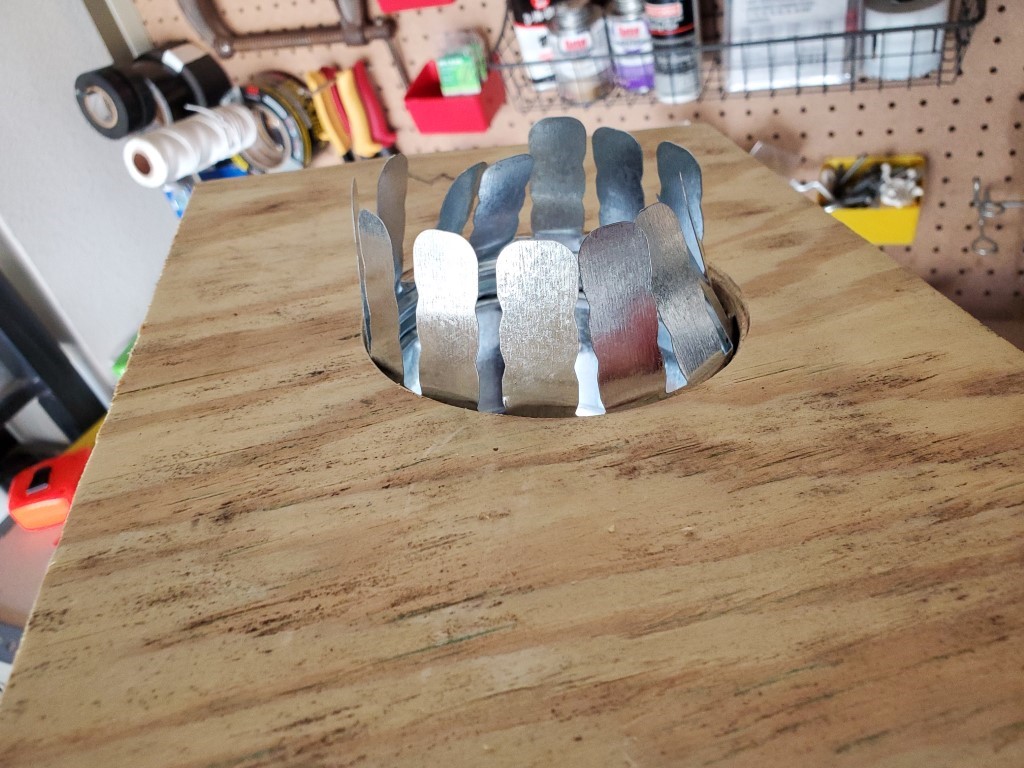
place. After dry-fitting the wood, cut a 4" hole in
the plywood and attach the 4" Snap Collar Duct Fitting using
small nails or screws.
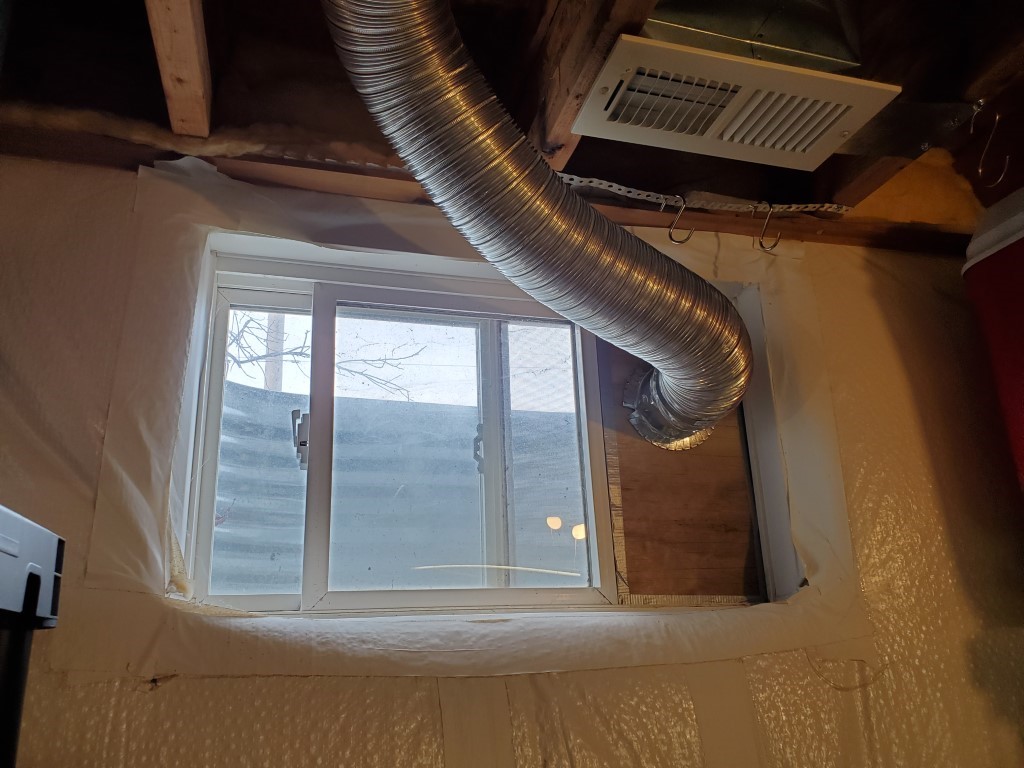
7. Attach the 4" Semi-Rigid Aluminum Ducting to the 90
degree elbow from the fan and connect the other end to your
piece of plywood in the window with the Snap Collar Duct
Fitting using a couple 4" worm drive duct clamps. I
thought I would need some kind of support to keep the
ductwork suspended, but it stays put pretty well. Make
sure the ductwork is at a decline from the fan to the window
so moisture is less likely to get stuck in there between
brew sessions. When not using the fan for brewing, I
remove the wooden panel and use an S-Hook and an eye screw
attached to the wood to keep the board suspended next to the
window. Also important to note, I like to run the
fan for 15-30 minutes after I'm done brewing to make
sure to dry out the fan and ductwork so I don't get any mold
or other issues in the system.
|